
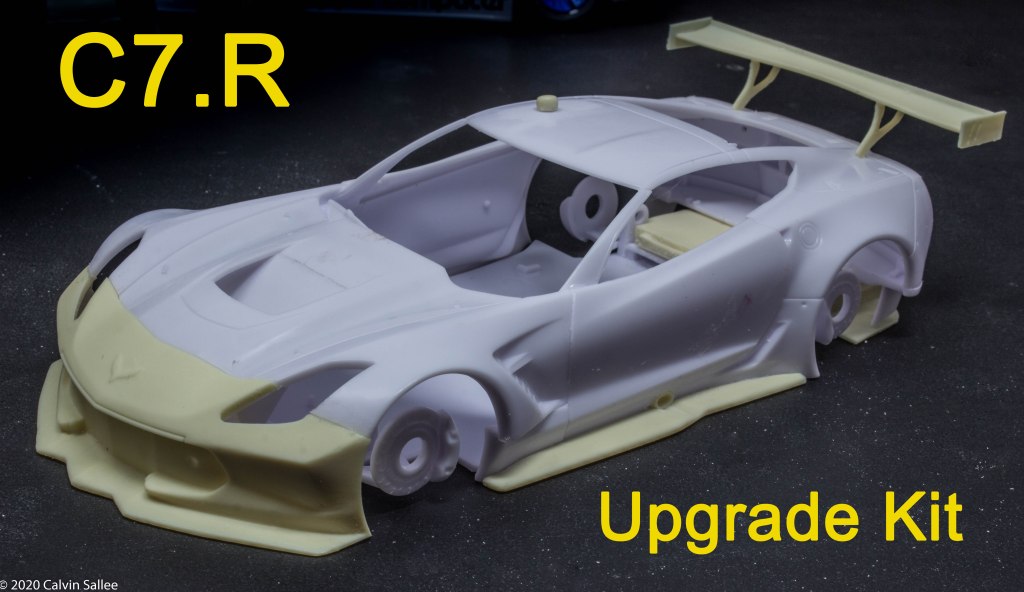
This blog will cover the process of taking the 1/25 scale Revell Corvette C7.R plastic kit and upgrading it to the post 2016 CR.7 specifications to comply with the new for 2016 Group GTE regulations using the new Classic Racing Resins C7.R upgrade resin kit. With new rear diffuser, more aggressive front nose, larger front splitter and slide splitters, and wider rear wing and accurate wing struts. This blog will show step-by-step in detail on how to convert your kit properly.
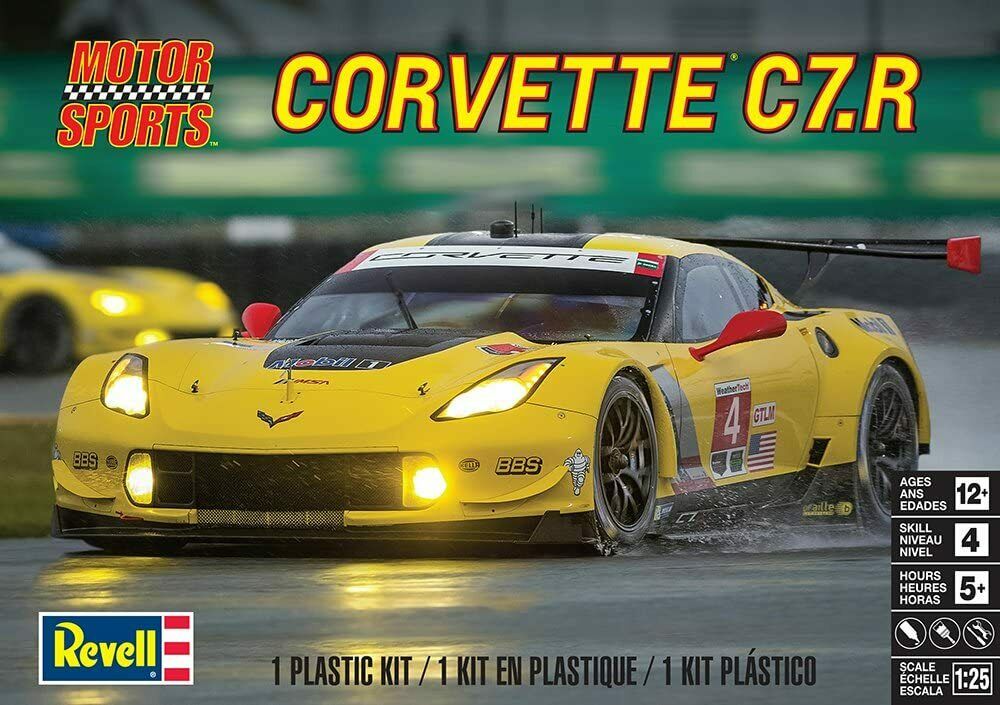
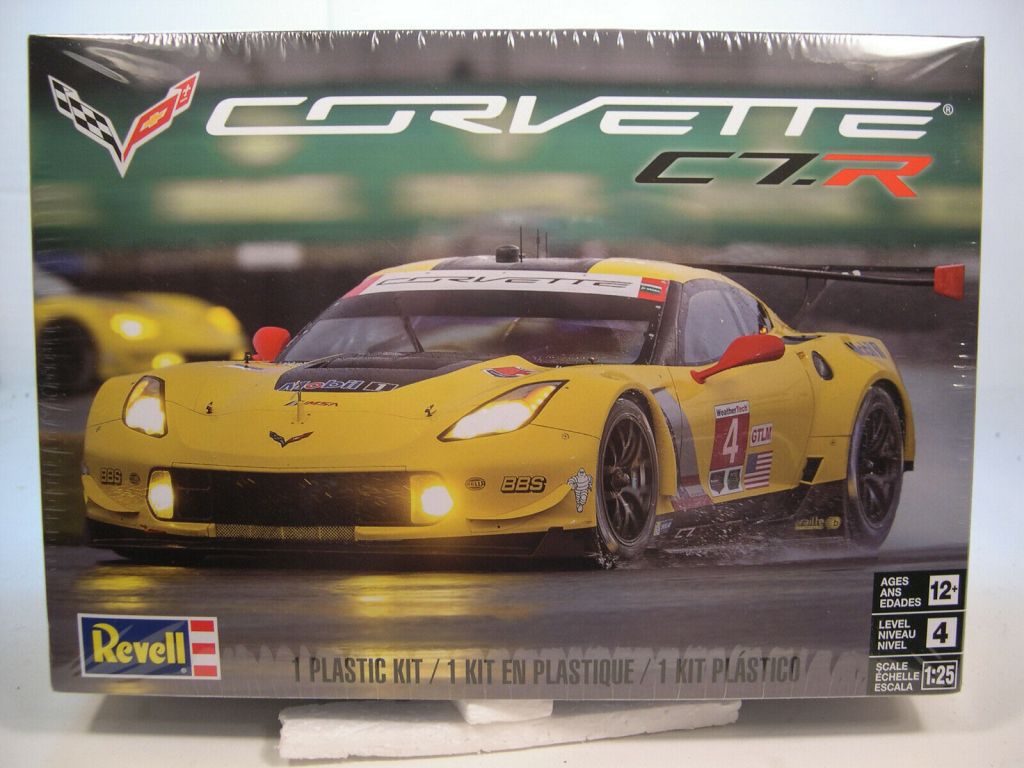
The Revell Plastic kit
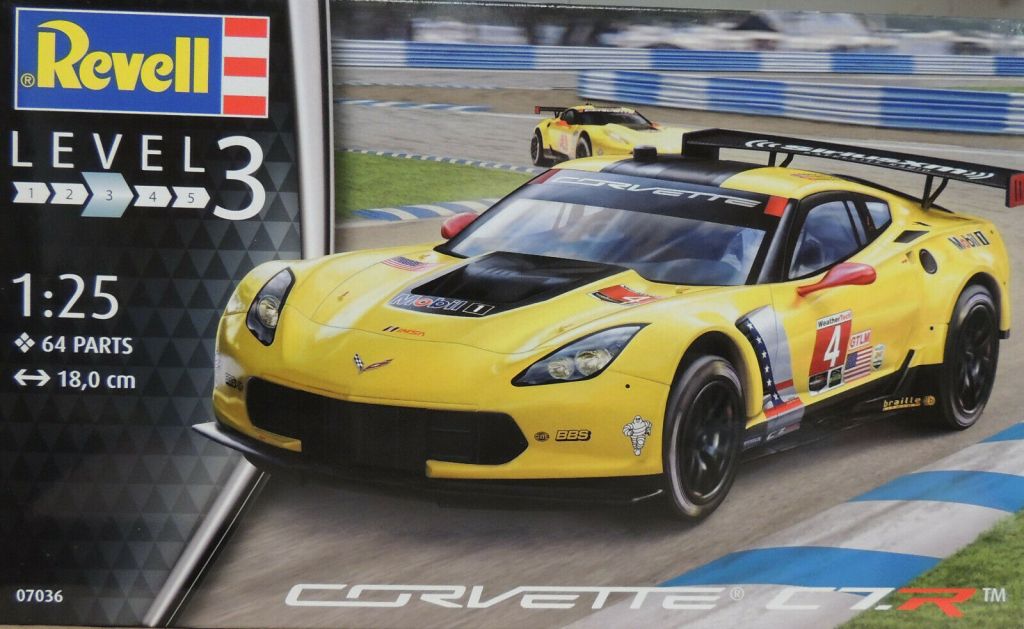
There are three different box styles for the Revell Corvette C7R. Revell modeled this kit around the first generation of the C7R 2014-2015. This first generation didn’t have a rear diffuser or the more aggressive front nose or large side skirts and a smaller rear wing.
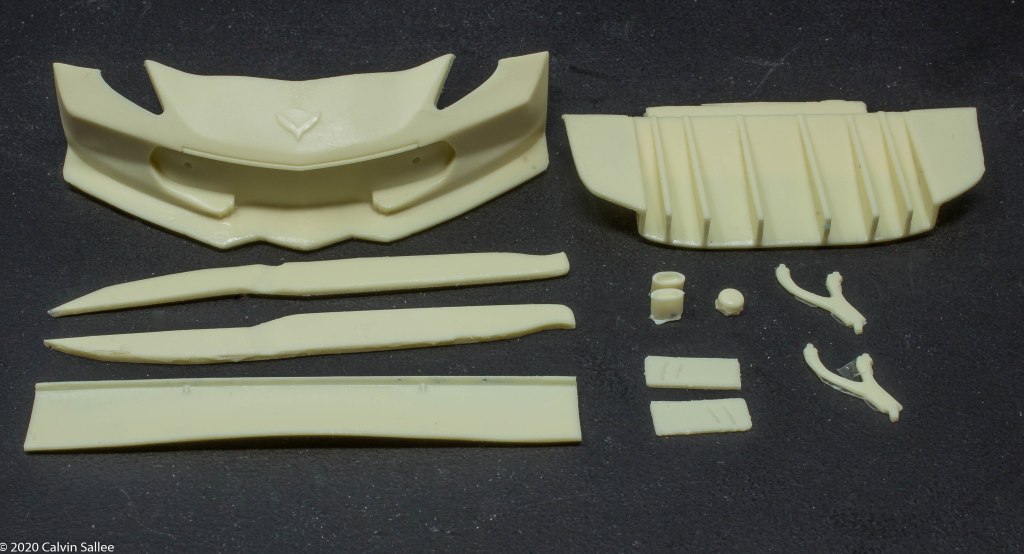
The Resin upgrade kit
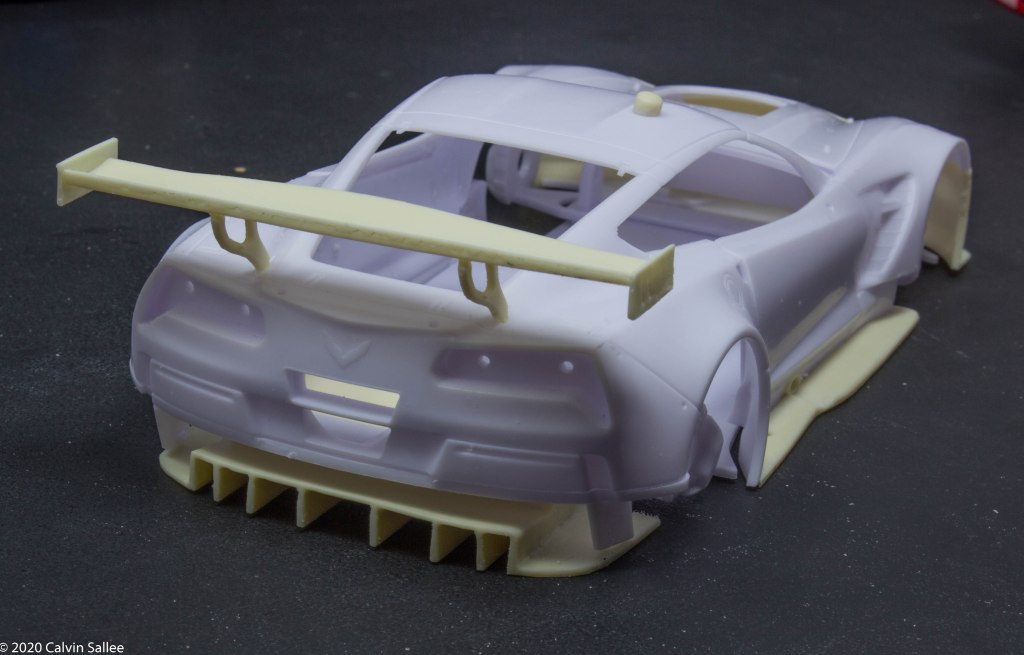
The Classic Racing Resins C7R Upgrade kit can be purchased HERE. The resin kit consist of a upgraded post 2016 nose with the sharper leading edges and larger front splitter, Rear diffuser, larger side skirts, winder rear wing, endplates, exhaust pipes, resin camera pod for easier application of decals and painting, and rear wing struts.
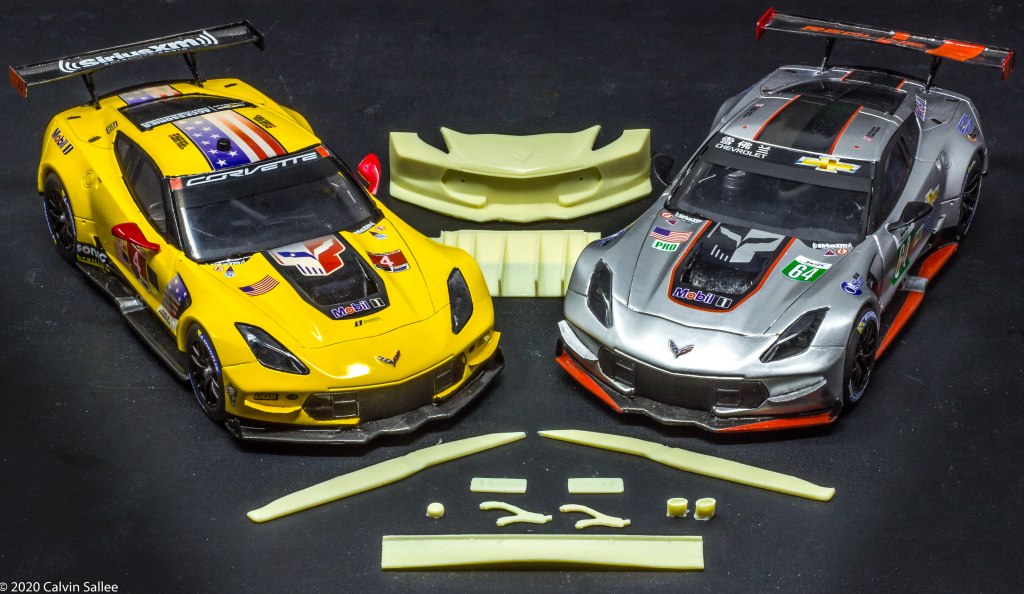
This resin upgrade kit is designed to easily adapt to the Revell kit with very little effort and figuring.
Comparison
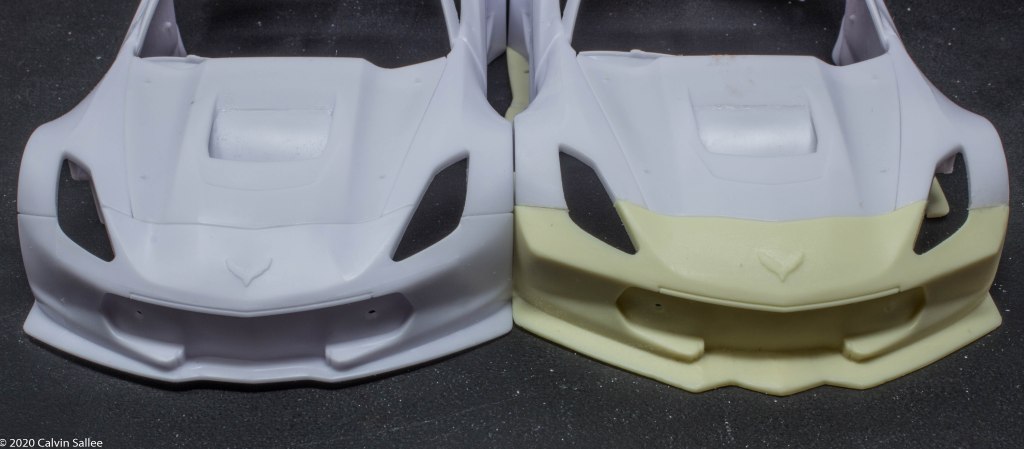
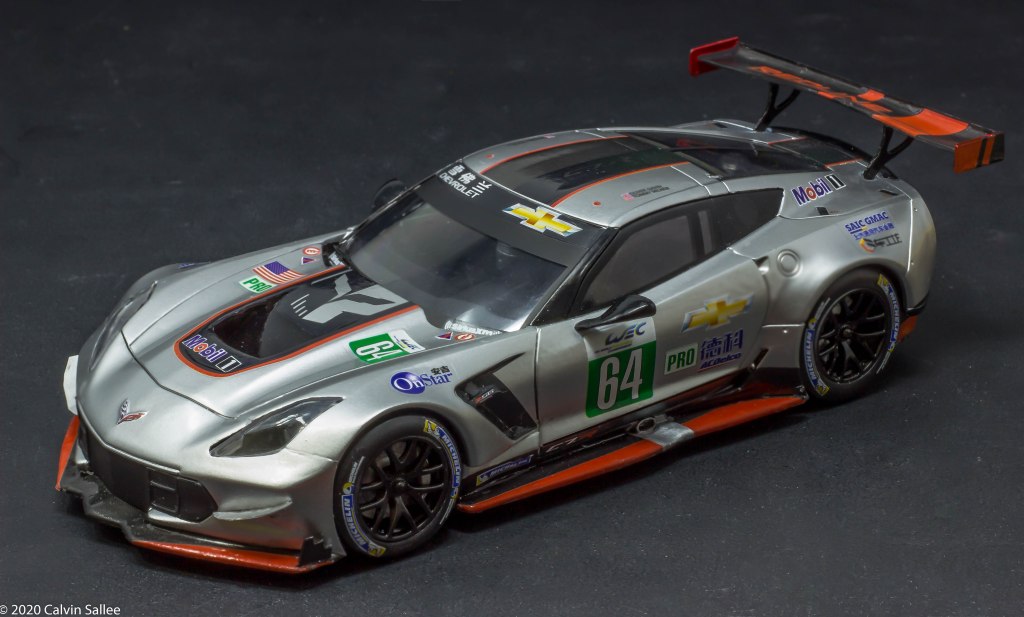
As you can see the 2014-2015 Front nose (left) has a more rounded look. The 2016-2019 (right) has a way more aggressive design.
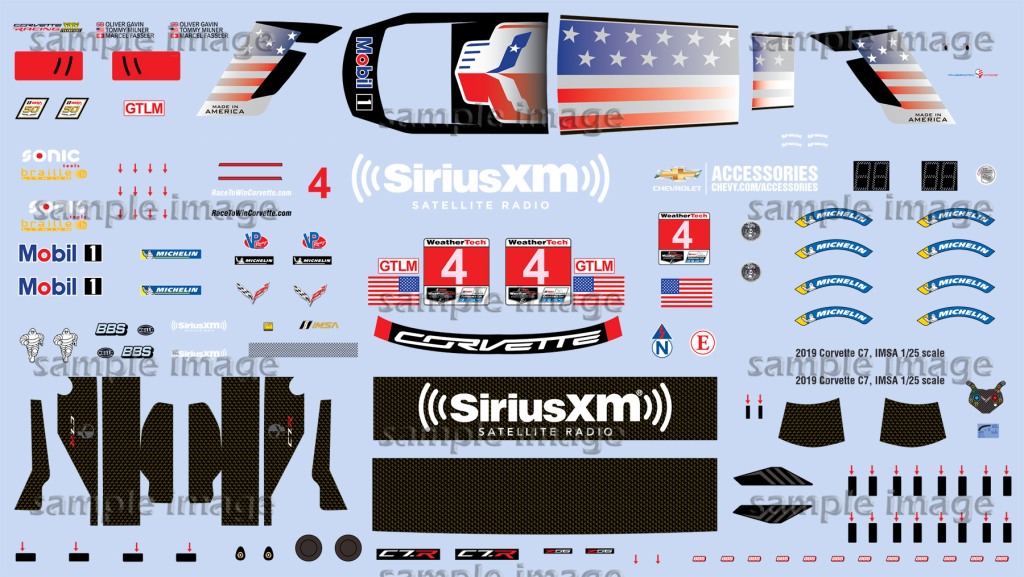
Decals
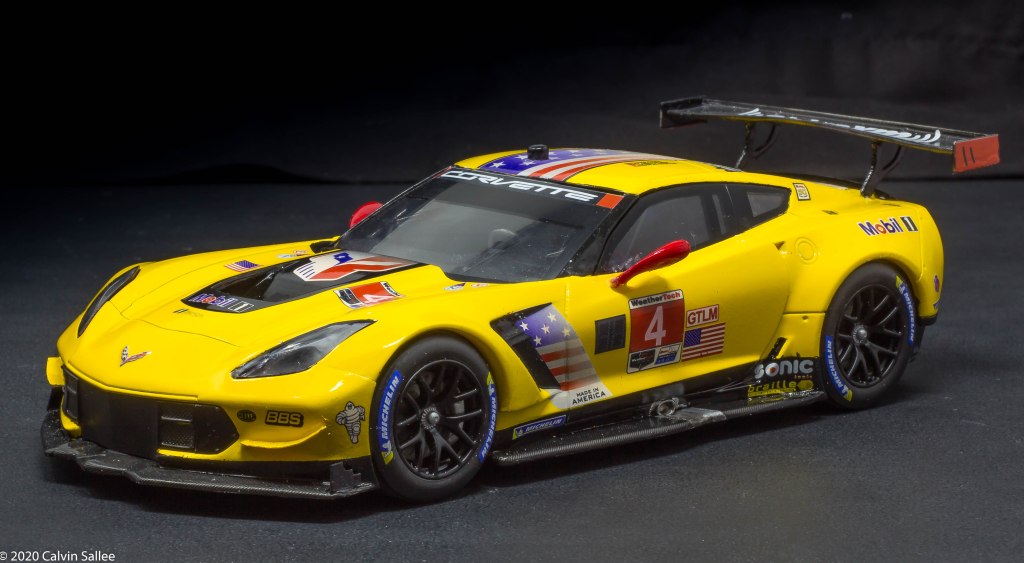
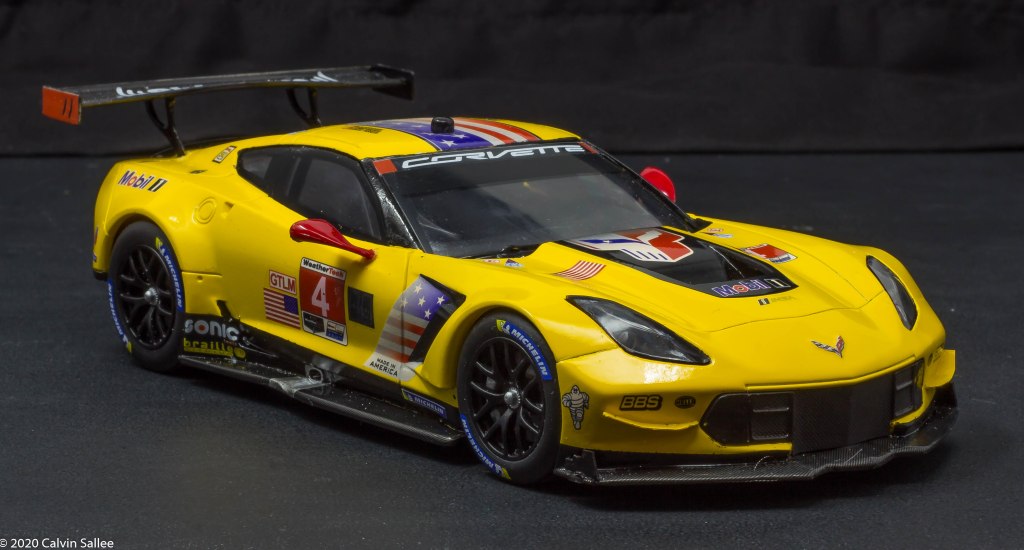
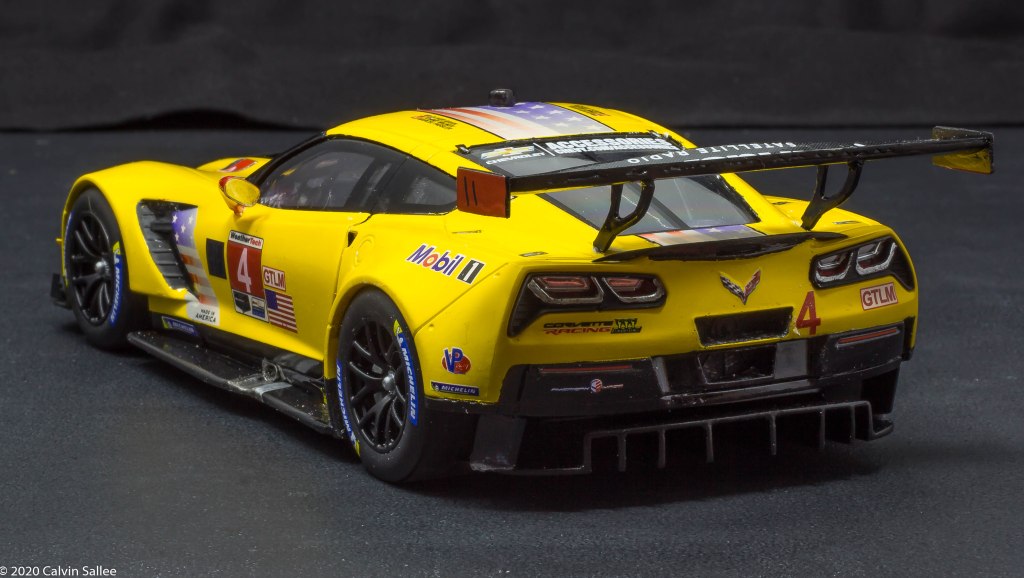
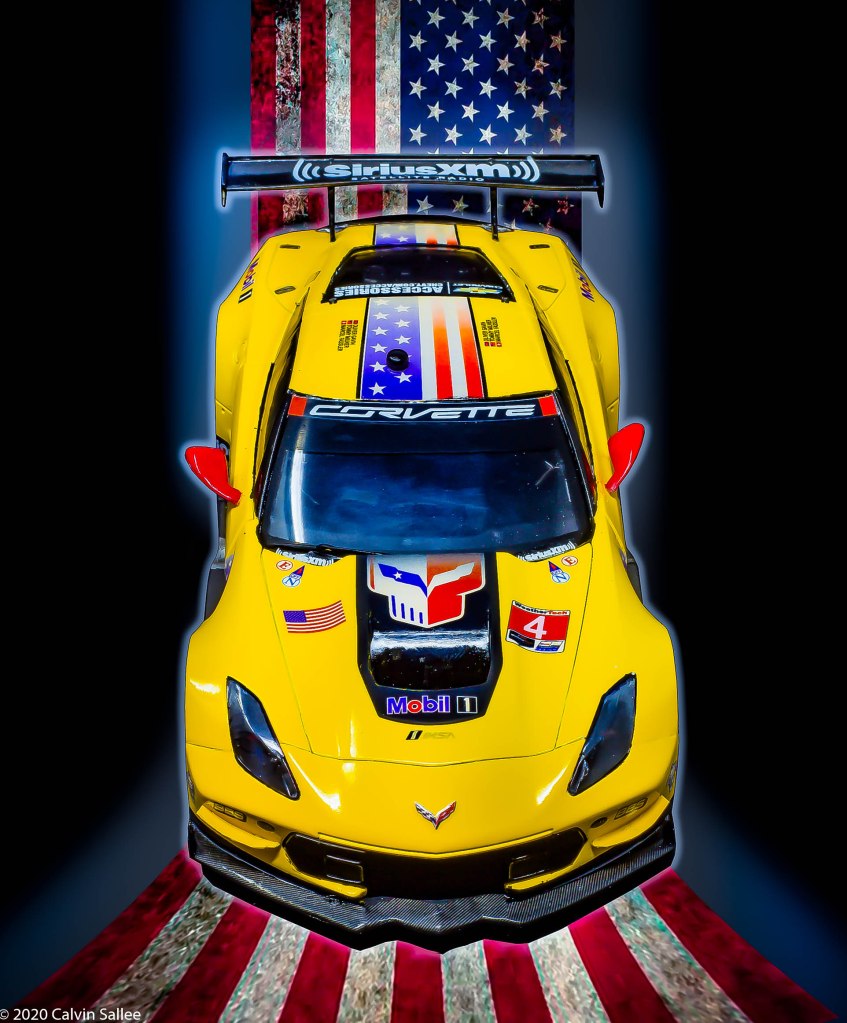
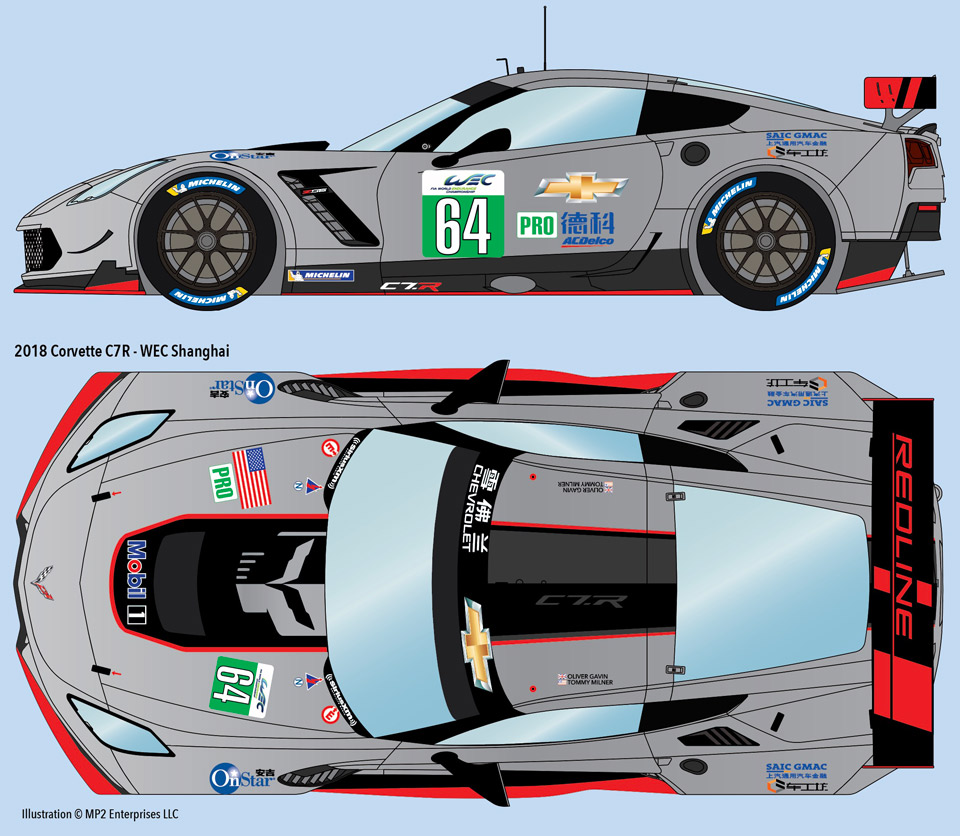
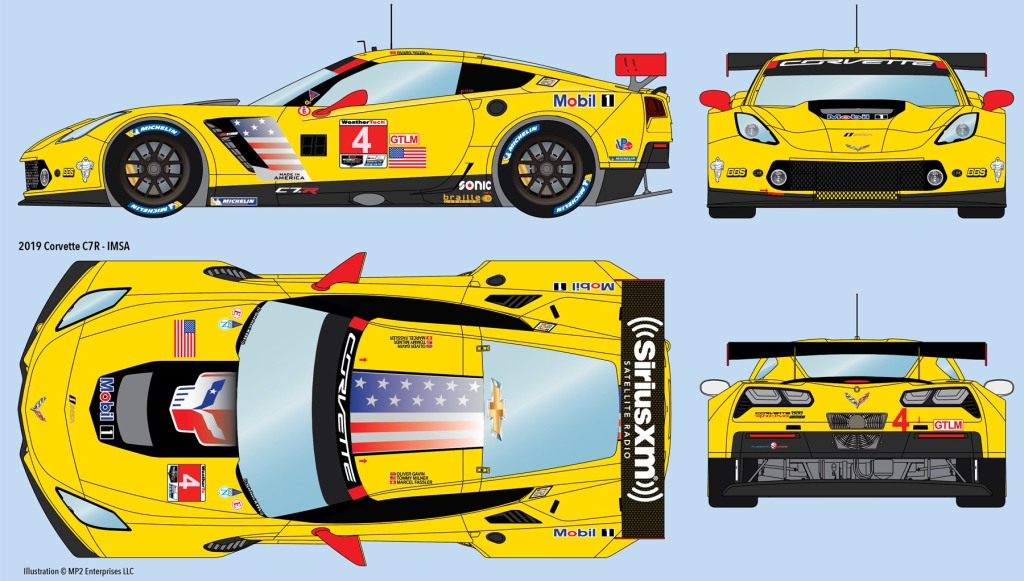
Indycals offers the 2018 Redline Corvette C7R (Shanghai) and 2019 Corvette C7R decal sheets. The 2018 Redline sheet has all the markings to build an accurate C7R that raced in the Shanghai 6hrs are available here at Indycals. The 2019 IMSA Corvette C7R sheet has all the markings you need with the spectacular American flag scheme. You can purchase an Indycals C7R decal sheet HERE

The conversion
We will cover the all the steps needed to convert this Revell kit into the post 2016 spec. The main items and tools needed in this upgrade is a Hand Held Razor saw, X-acto knife razor saw, Super glue, Styrene plastic sheets and sanding files.
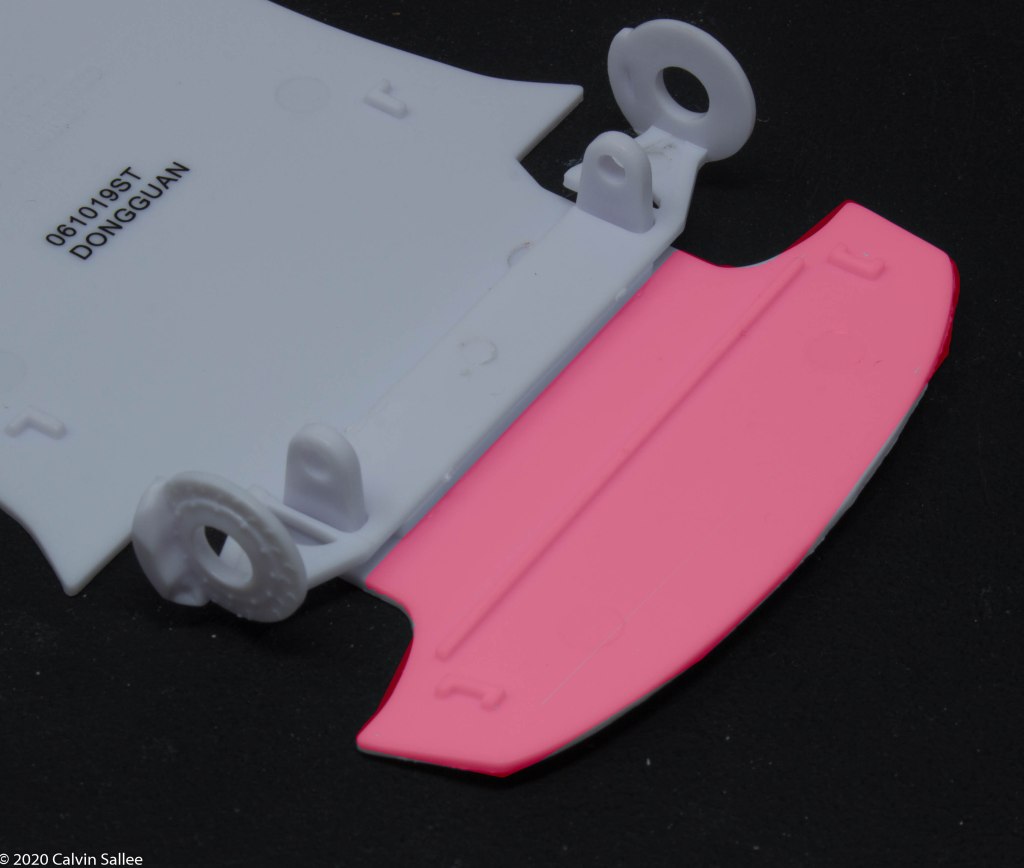
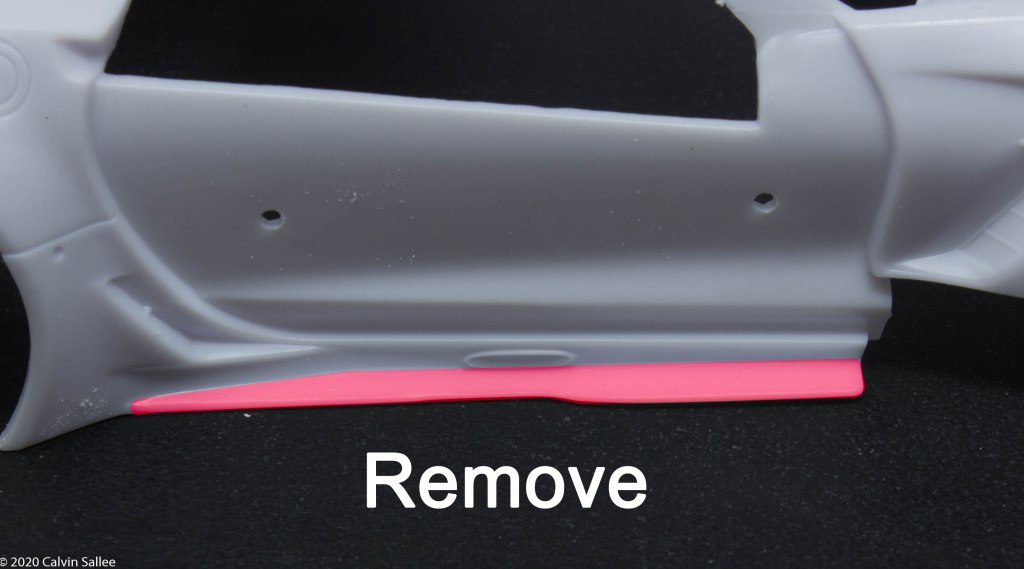
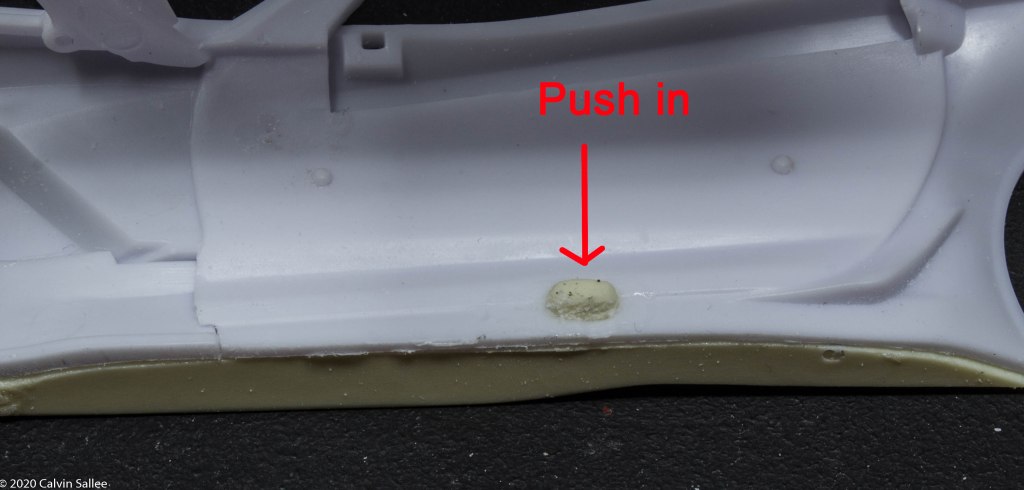
First step is to follow the kit instructions and glue on the rear end part as per the instructions say, then cut off the area highlighted in red.
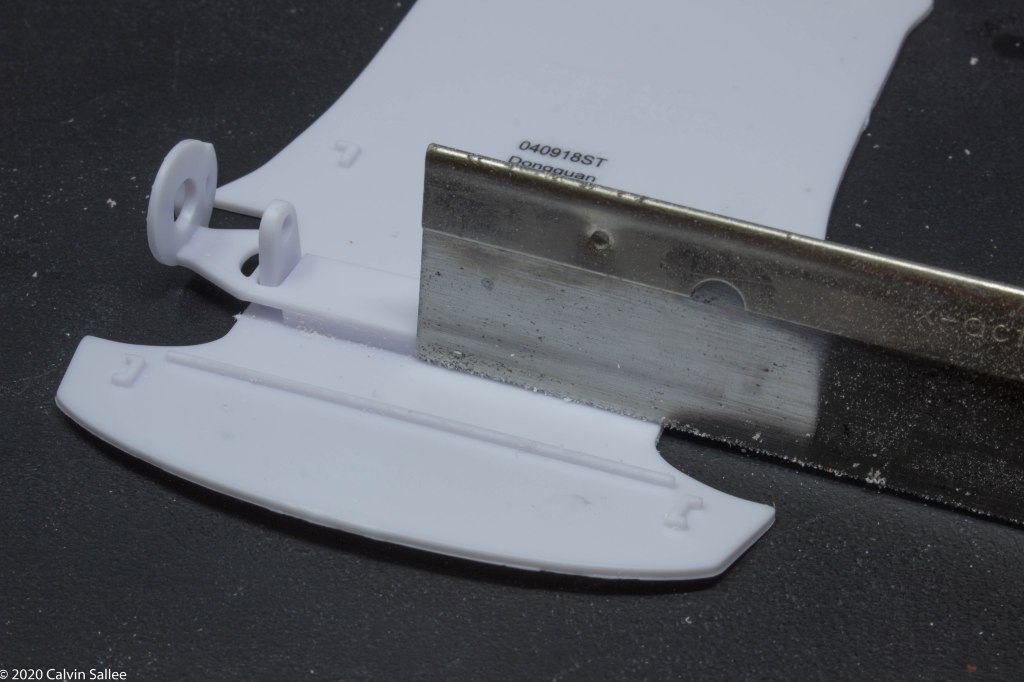
Use a razor saw to cut off this section flush up against the rear end part.

Sand and de-bur and rough areas.
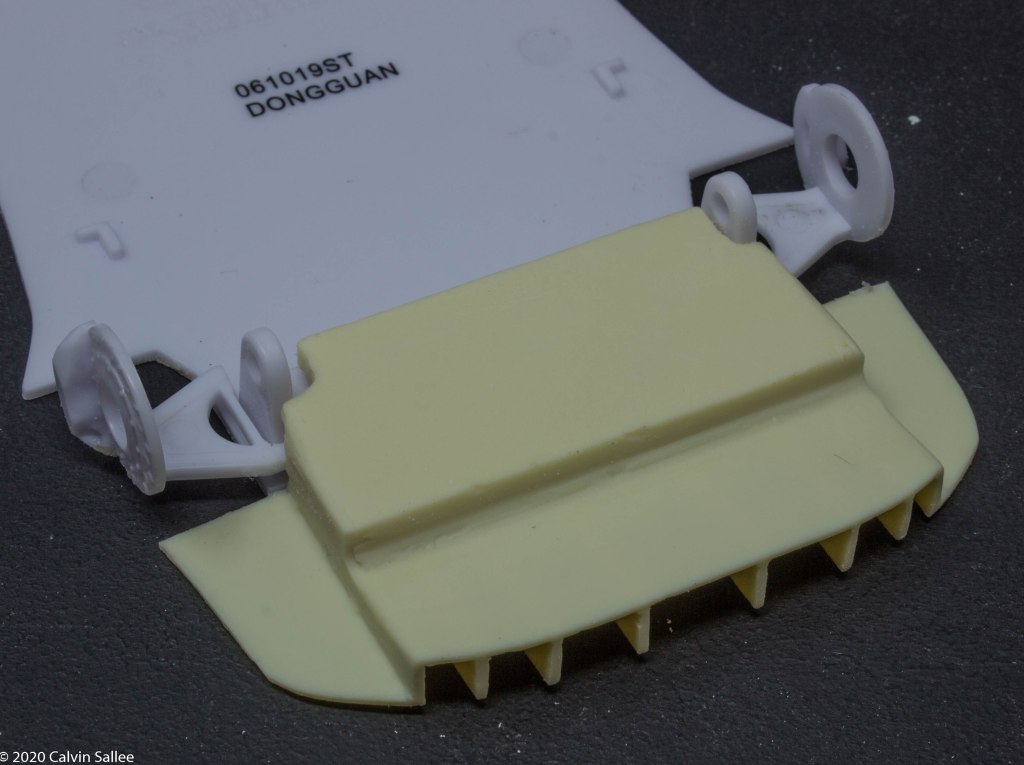
Use super glue and attach the rear diffuser flush and level.
The diffuser should be level with the rest of the under tray.
Use a dremel and grind off the existing kit side splitter flush up against the side of the body.
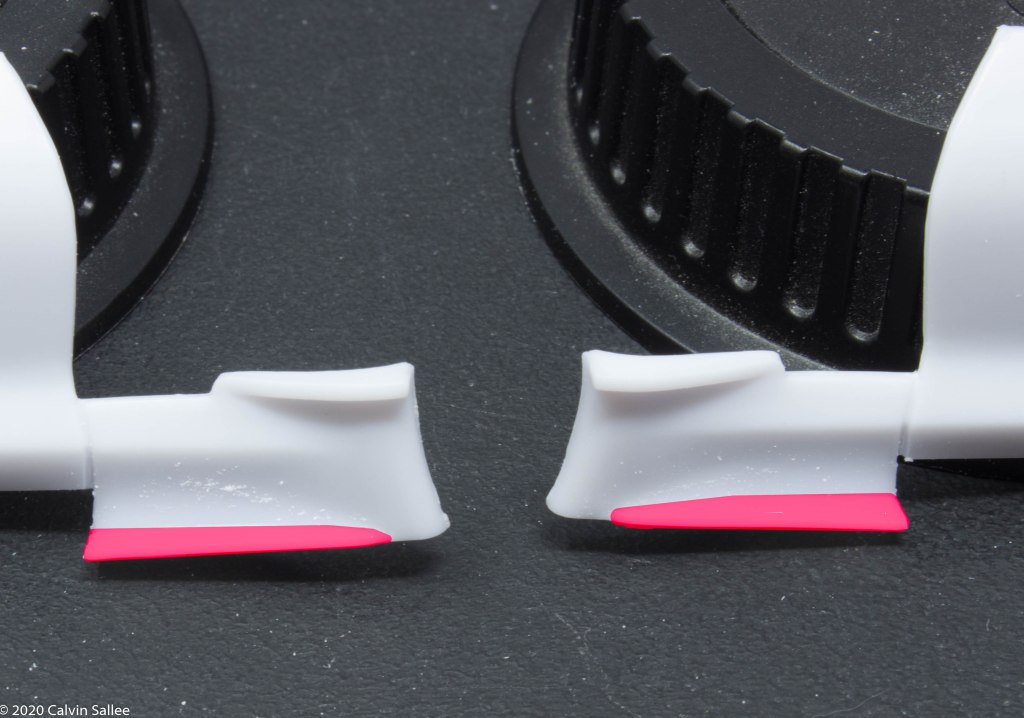
Do the same on the separate side door parts too. Grind down flush and sand smooth
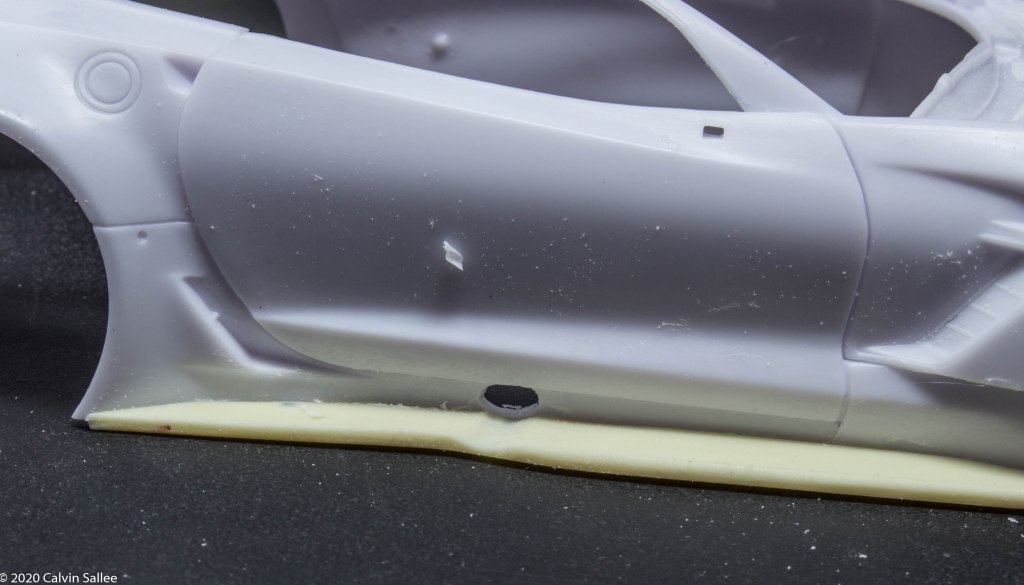
Super glue the side splitters into place, be sure to test fit before gluing, sand if needed for adjusting. Then drill out an oval shaped hole for the resin exhaust pipe.
Push the resin exhaust pipe from the inside out is the easiest way.

Make adjustments to the exhaust pipe if needed.
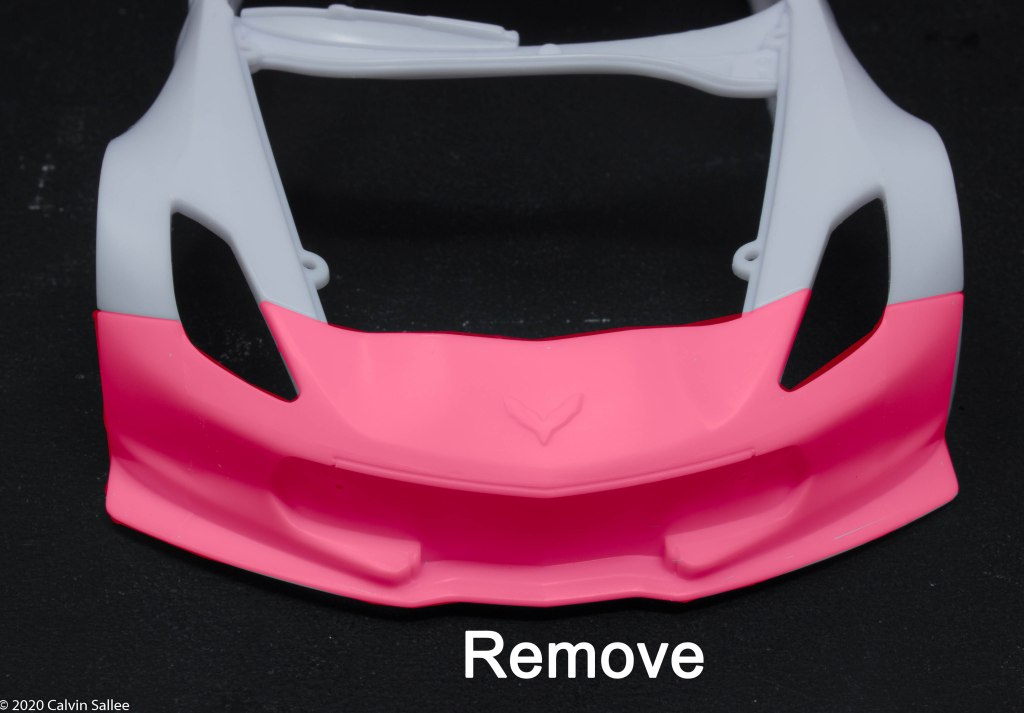
Use a razor saw to remove the nose from the kit body. Preferably use a very thing razor saw you attach to an X-acto knife
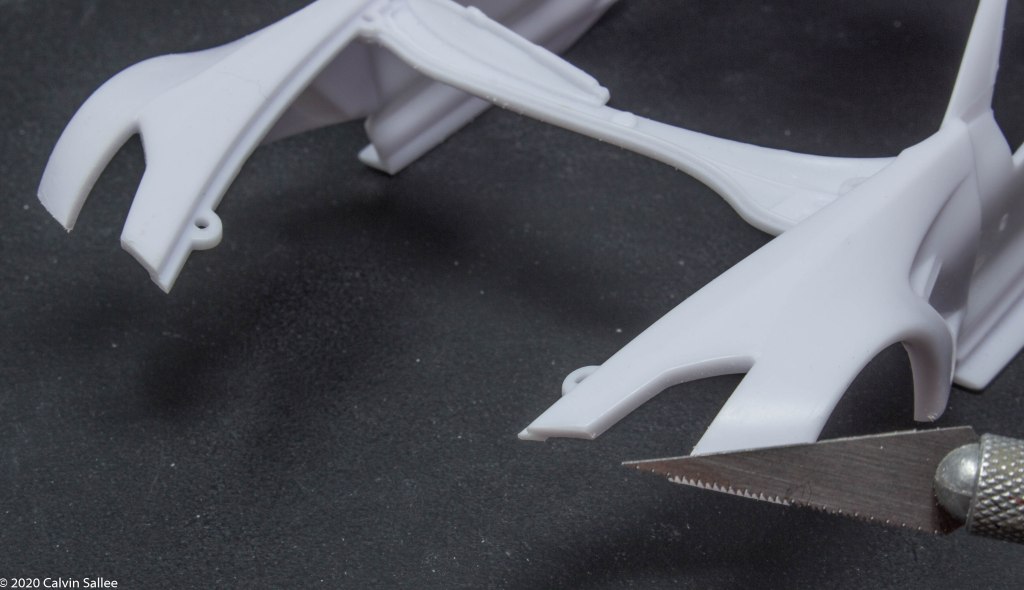
Then cut down the gap between the nose and body. Be sure to sand and clean up the cut area afterwards
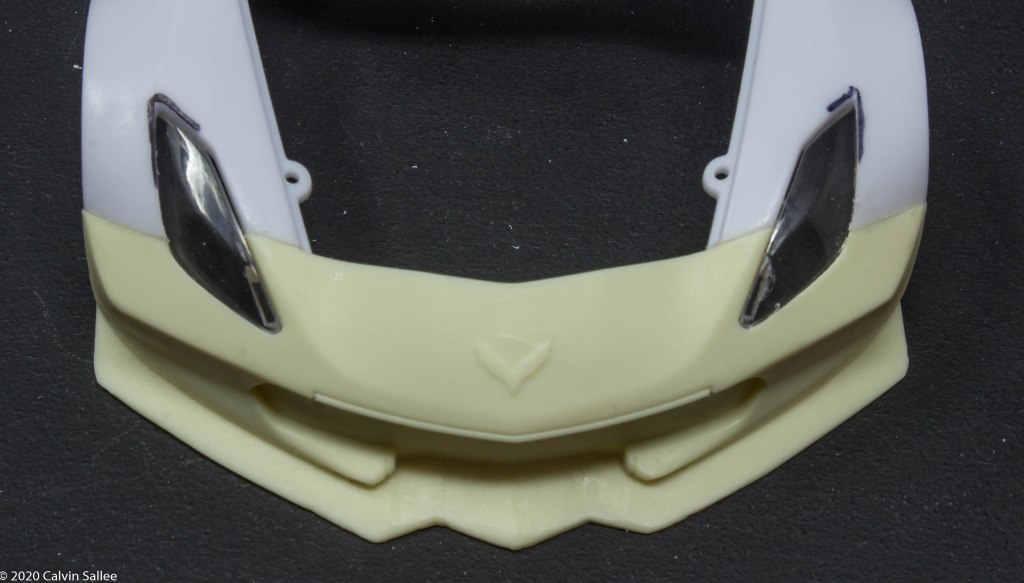
Super glue the resin nose into place and make sure its level. After the glue has setup test fit the clear headlight covers and make an adjustments if needed. This is very important as after painting this headlight hole will become even tighter with paint applied.

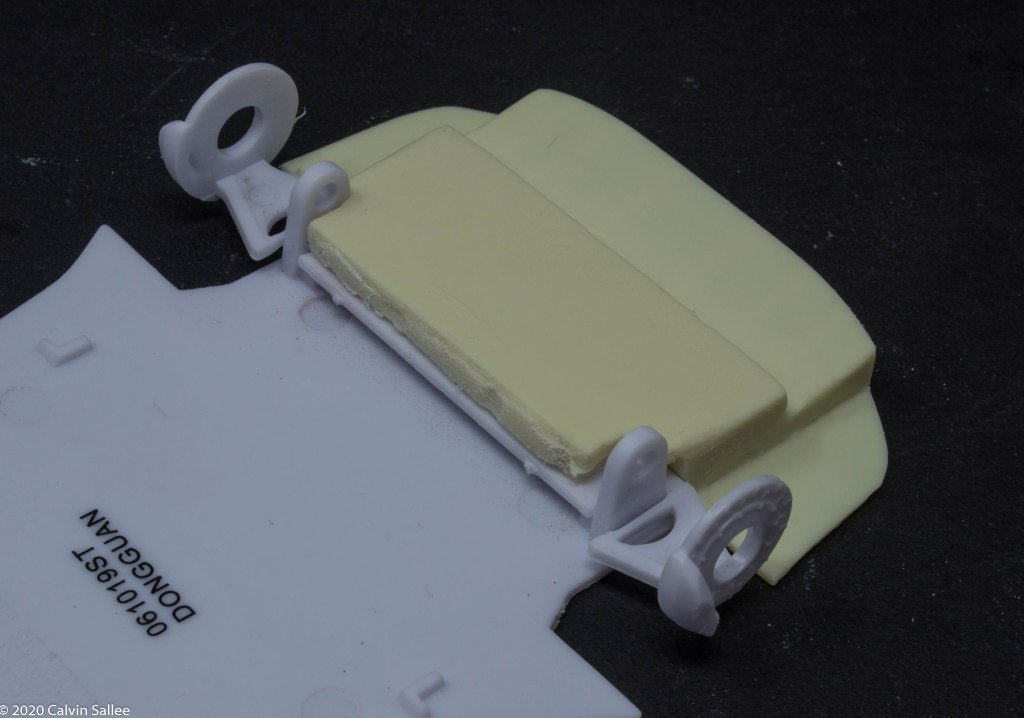
Remove the molded kit camera pod. This is an inconvenience to the model builder as this abject makes the painting and decal process more troubling.
The painting process
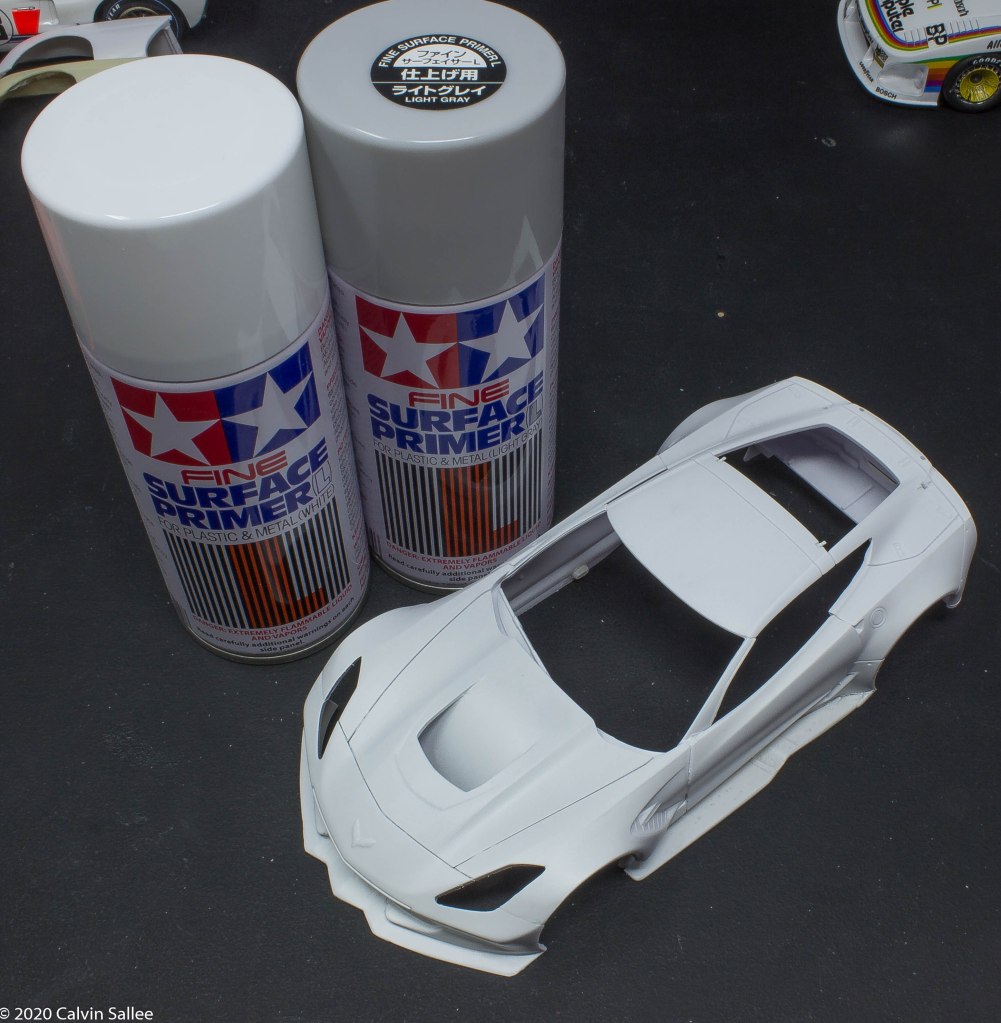
After the resin parts have been attached. Start by using a scratch pad and scuffing down the entire body to make sure of proper paint adhesion. I recommend using a combination of Dawn dish washing soap and fine grit sand paper of the resin parts to help clean the resin parts of any possible mold release or contamination. Start with a light coat of Tamiya Grey Lacquer primer over the resin parts first and fix any possible blemishes. After all the blemishes are fixed apply Tamiya White Lacquer primer to the whole body and observe for any blemishes.
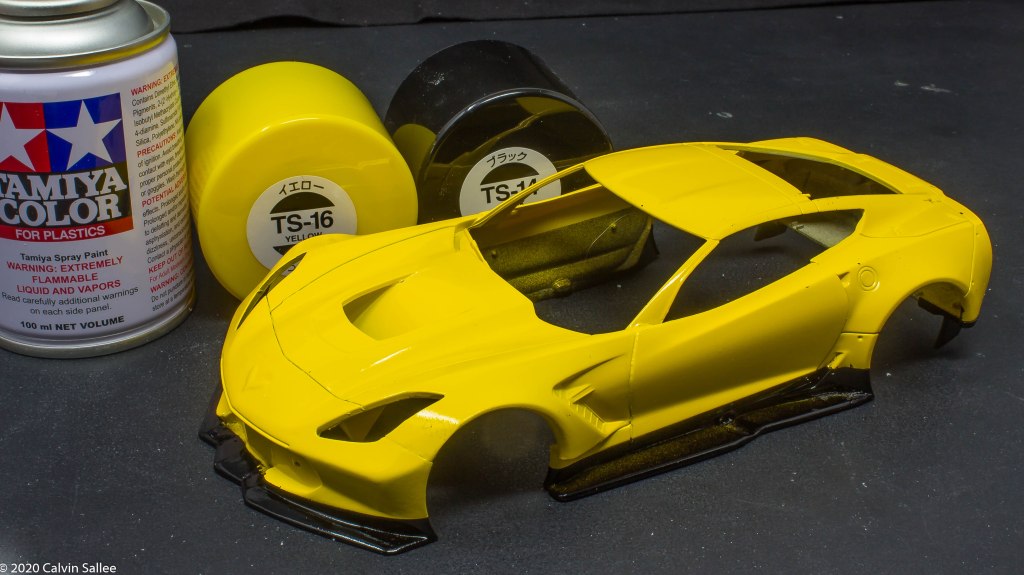
After the priming process is finished. I used Tamiya TS-16 Yellow and Tamiya TS-14 Black on my body.
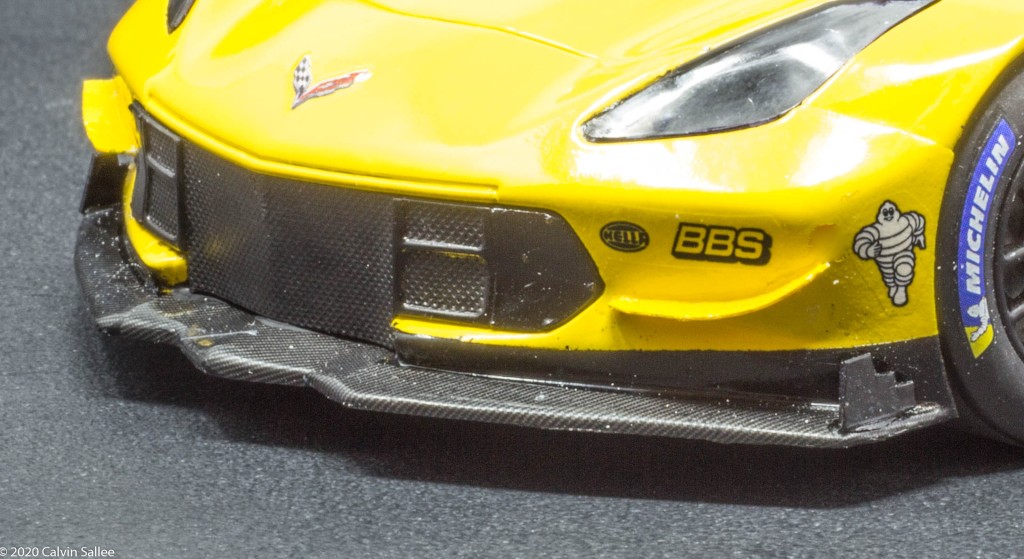
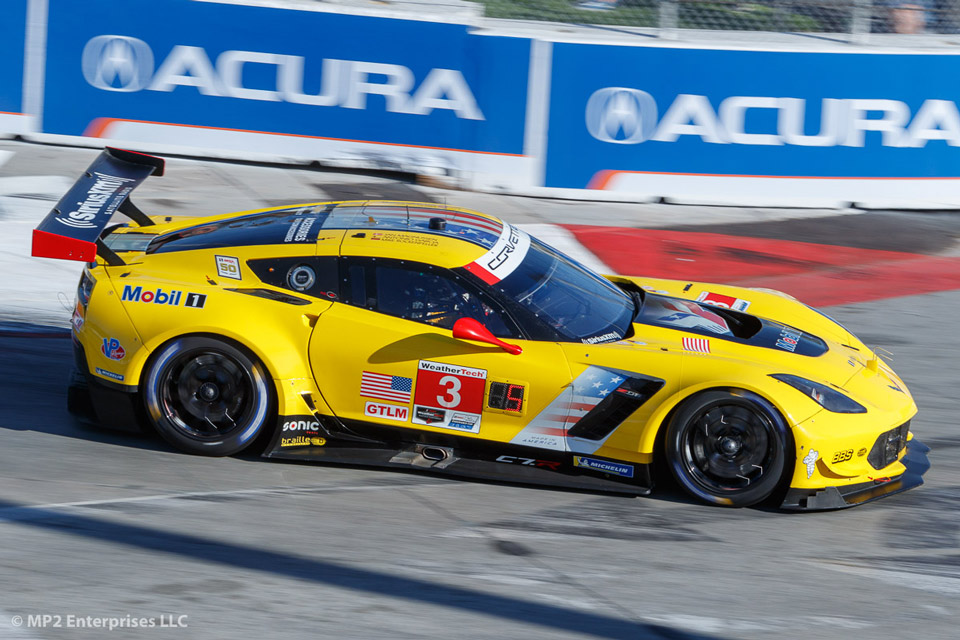
This next step is going to be up to you on how you will decide how you want to approach it. The C7R a lot of the times had front nose fines on each side but not all the time. I avoided molding these into the nose as they are too thin for the resin casting process. The design also varied too. I depicted my fins as run in the 2019 Long Beach Grand Prix. I use very thin styrene and bent in the shape you see. I also cut out the front splitter fins with a slightly thinner piece of styrene
Don’t forget to paint and glue the Camera pod in the proper location on the roof.
Before gluing your body onto the chassis be sure to cut the bottom of this fan part off before gluing into the inside back end of the body. The rest of the build is just a matter of following the Revell kit instructions.
The final results