This blog post reviews and shows how to properly convert the 1/24 scale NuNu Porsche 935 K3 kit into the 1981 Cooke/Woods Racing Style Auto Porsche 935 K3/80 “The Warhorse”.
About the car
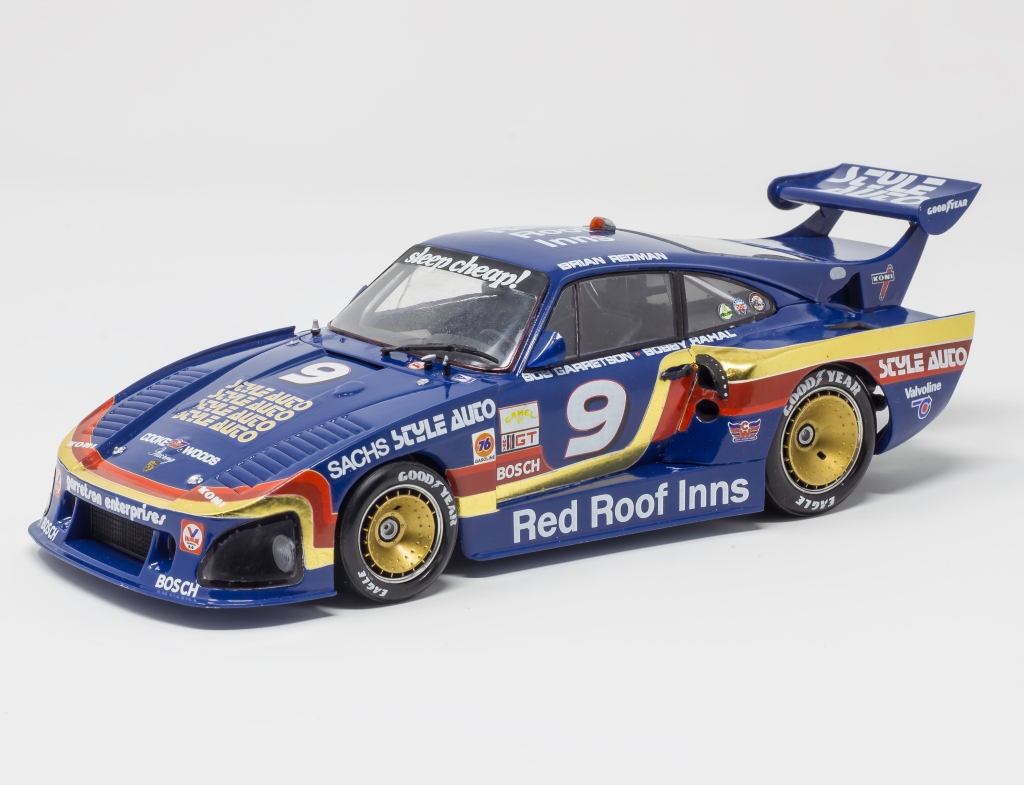
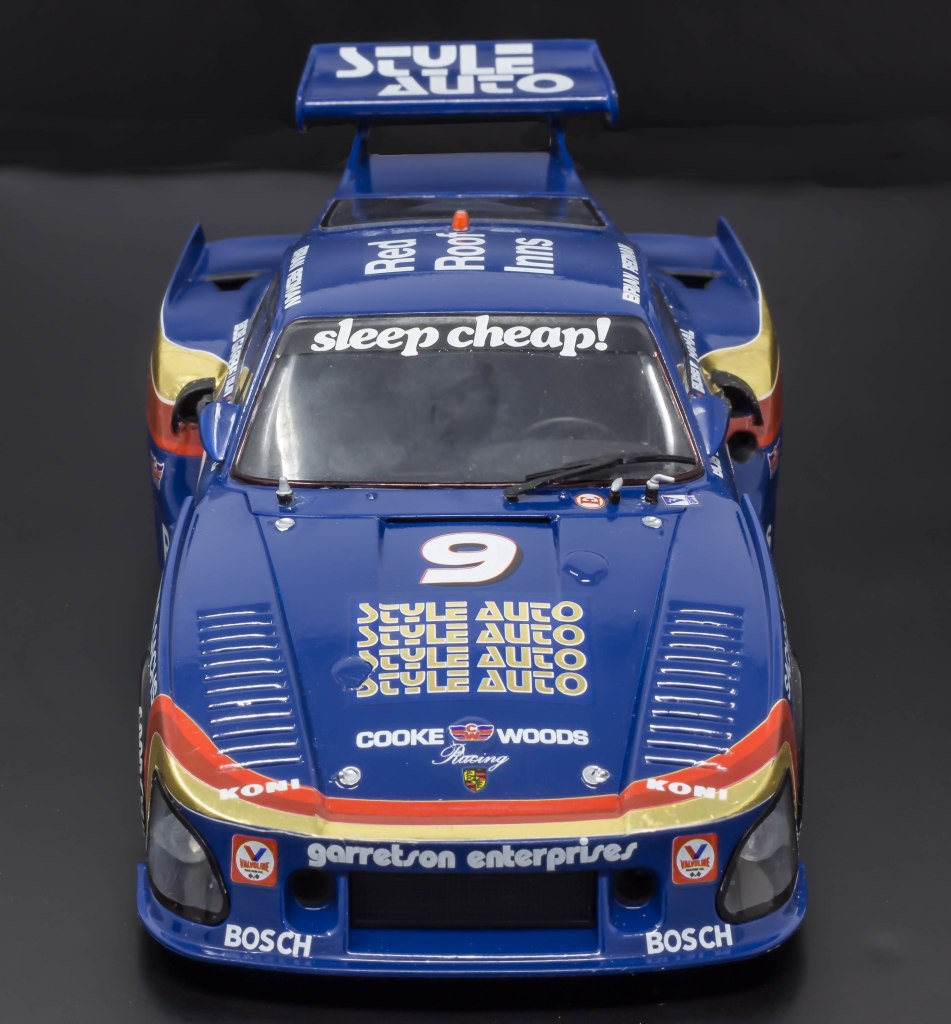
In its third year of competition, Chassis # 009 00030 was in Dark Blue, red, and Gold colors for the 1981 24 Hour Pepsi Challenge at Daytona, after the 1980 season with Apple Computer colors. The Garretson factory-built Porsche 935 was powered by a high-boost 3.5-liter Sprint-format powerplant. Brian Redman, Bobby Rahal, and Bob Garretson shared driving duties during the 24 hours.
This is a good reference website HERE about the 1981 Daytona 24 hours.
The Conversion kit
These fenders depict the ones used on the 1981 Cooke/Woods Style Auto Porsche 935 K3 at the Daytona 24 hrs – chassis number: 009 00030. These fenders have a unique hole opening with a cap lid over the top. The left fender has a single circle opening below. You cant find these fenders or decals anywhere else. There are other aftermarket resin fenders out there, but its beyond me what car they depict as? If you follow my blogs you know, every K3/80 fender is DIFFERENT! I put great attention towards the accuracy of these K3/80 fender kits I produce with the details of all these different designs.

You can buy 1981 Daytona 24 hr winner fenders HERE at my store
The plastic kit
The NuNu kit came out December 2019 as the 1979 #41 Kremer Porsche 935 K3 -24 hours of Le-Mans race winner, this was very exciting news to me as a model builder and businessman because there’s endless possibilities of K3’s that can be created from this NuNu kit. I have many conversion kits planed for this K3 kit. I already have many versions of different types of fenders for this kit HERE
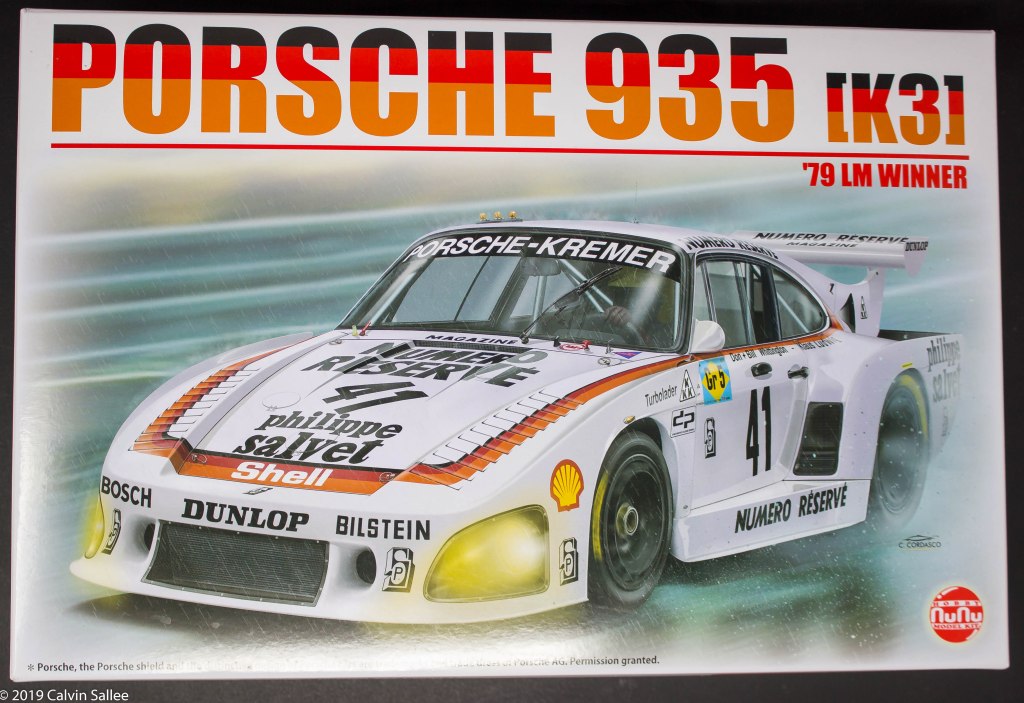
You find many 1/24 NuNu Porsche 935 K3 kits on ebay HERE, using my affiliate link.
The Conversion

I recommend leaving the rear fender spruces on until you are done gluing on the entire fender assembly as not doing this will make your fit very complicated as the entire rear section will bend around without the spruce holding into place. But it is nice that the kit manufacture put such big heavy duty spruces holding up the roof and all the fragile parts in place because there has been so many car models get slightly bent or crushed because of not the proper reinforcements
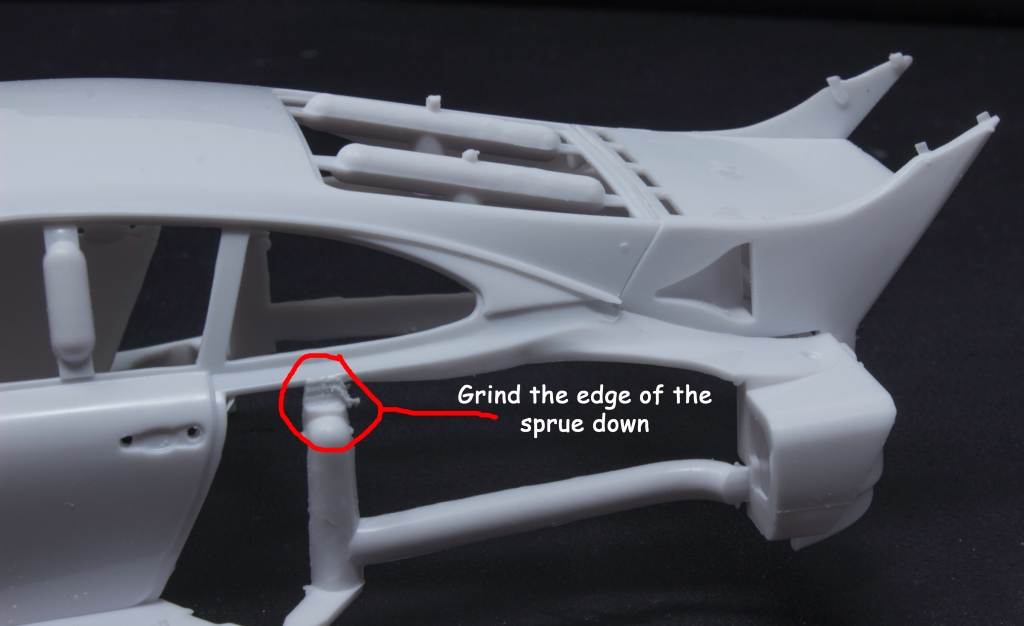
Before test fitting grind the edge of this spruce down with a Dremel. The fender wont fit unless you grind it down enough for it to fit. Clean and de-bur all the edges on the fender/engine cover area. The fit is very tight with all these parts and test fitting will be VERY important.

Be sure to fill and clean your resin fenders. I don not use mold release in my molds but the resin still can pick up some oil contamination from the silicone rubber mold. Soaking in tire bleach or spray and rinse down with oven clean works well. Also when sanding the surface of the resin its recommended to use Dawn dish washing soap as that helps get any possible grease off

Painting
This next step is going to be the most challenging part of the whole build. Lots of decisions need to be made after the primer process is finished. Unfortunately in the scale modeling world, there are limitations, one of those limitations is the scarcity of waterside decal Gold Foil printing. Questions for you to answer before you continue are: Do you want to paint the gold onto you model or use Gold Foil Decals? If so, what kind of Gold paint are you going to use? Will the combination of Dark Blue paint and Gold Paint be safe to use with each other? When making my decision I instantly wanted to avoid the Gold paint and masking process all-together as Im more of a decal guy and I choose decaling over painting, any day. If you’re like me and would rather use Gold Foil decal, then your decision is easy, and that is to simply paint the whole car body Dark Blue (See next chapter for Decal Gold Foil tips.
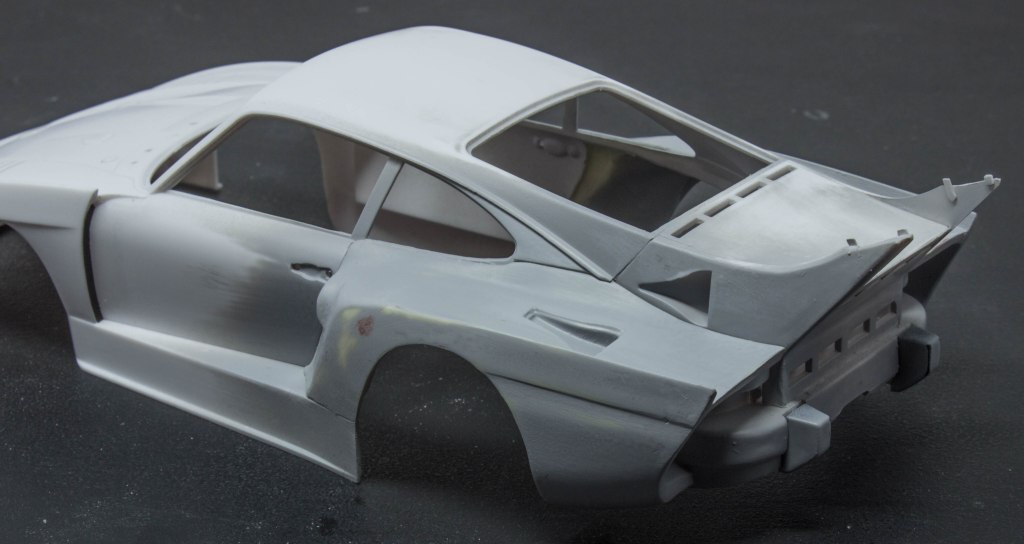
Use Tamiya Grey Primer to find any imperfections that might be on the body. That is the main reason for applying primer is to help find any problem areas and to give the color coats a nice base to adhere to.

After apply coats of grey primer, I prefer to give the body a couple coast of Tamiya White primer. When using Tamiya spray paints, its important to use a white base, because Tamiya spray paints are very thin and translucent.
Masking Template
Masking templates are OPTIONAL when making your purchase at my store and will be fulfilled and shipped separately by Indycals, along withe the waterslide decal sheet that comes automatically when you buy this fender conversion kit. How you use the masking template is up to you, are you going to use it for paint or use it to cutout Gold Foil decals with?

I recommend using Tamiya TS-15 Blue lacquer Spray paint as this is the color the decals are matched to so they blend into the paint job.


The Gold Foil
One of the challenges of this particular build is the gold foil scheme. There’s no denying it, its a challenge to get that reflective gold onto a scale model. Gold Foil is very hard to come by in the modeling world. I do have a very limited supply of Studio 27 Gold Foil Decals which can be purchased at my store. HERE
Gold Foil Decal sheets can be purchased HERE

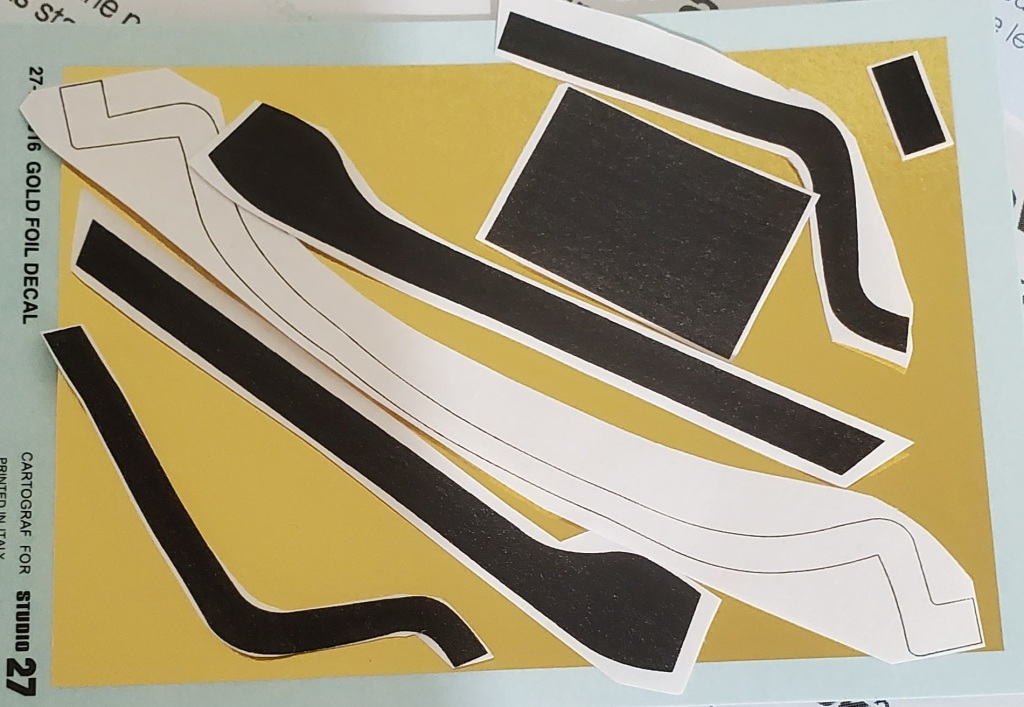
Its best to layout your masking template over the single Gold Foil sheet. I recommend cutting the sides of the front fender nose gold stripe to make the decal applying process easier and to make the better use of the Gold Foil sheet.

Applying these Gold Foil Decals are very easy. I used this sheet and they are NOT dry or brittle. I recommend being conservative on the Decal setting solution as with any foil decal, they can over-crinkle. Its also recommend to be careful with Clear coating over any foil decal as it will crinkle them up. Luckily with this scheme the Indycals decal backing of the red/white stripes will be covering the Gold Foil.

You also may note the large square Gold Foil decal on the hood and there is also a small one on the back of the engine cover. These are for the logos that are gold foil and the only way around this issue was to print the outline of them and match outline to the Dark Blue paint.

The Decal process
After doing a few other Porsche 935 K3 conversions I realized a decal sheet for one of my favorite cars was most likely not going to be produced for the complex nature of the scheme the stripes and the famous Gold Foil. I always enjoy a great challenge and was going to figure out a way to get this decal sheet produced one way or another. I approached Indycals and made a deal, if I draw up the decals, he would print and fulfill them for me as an exclusive deal, only available to buy on my website. So for the first time in my model car building career I taught myself how to properly draw up a decal sheet, with tutelage from Indycals. I’ve always known how to draw, but learning the software was what I didn’t know. But after a month I finally had a decal sheet for this car that was acceptable to my standards. There is lots of details that most die-cast cars, slot cars, and other random 1/43rd scale kits of this car missed when it comes to the proper layout, decals and accuracy of this sheet. I have proof of every single decal on this car during race day. If you want the most accurate model of this 1981 Winner, ever, then you’ve come to the right place.

I always recommend Walthers Solvaset Decal Solution when applying Indycals
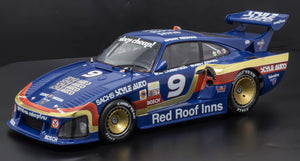
The Finished Build