This blog will be a how-to tutorial on converting the 1/24 Fujimi Ford GT-40 MKII kit, into the unique Shelby American Ford GT-40 X-1 Roadster, driven to victory by Ken Miles and Lloyd Ruby. I will show how to properly convert the coupe into a Roadster with the new resin conversion kit that I offer in my store, HERE.
About the car:
For a more detailed history lesson on this car check out this article from Hemmings.com
The Conversion kit:
Resin Kit:
-Resin doors
-Resin Windshield base.
-Windshield side pillars
-0.015″ thick clear Vac-U-Form windshield
-0.010″ thick Clear Vac-U-Form side windows
-Resin rear spoiler with styrene rod for braces
-Resin dash top
-Resin Driver figure with the likeness of Ken Miles
-Templates
-Comprehensive instruction sheet.

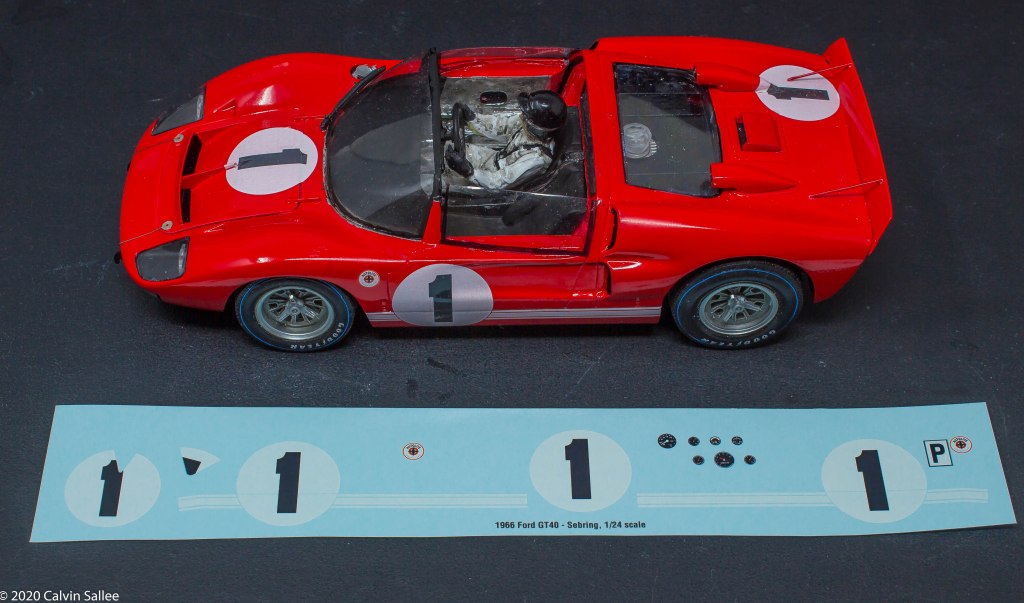
Decals:
The Decals are designed and printed by Indycals. This sheet accurately depicts how the car ran in the 1966 12 Hrs of Sebring
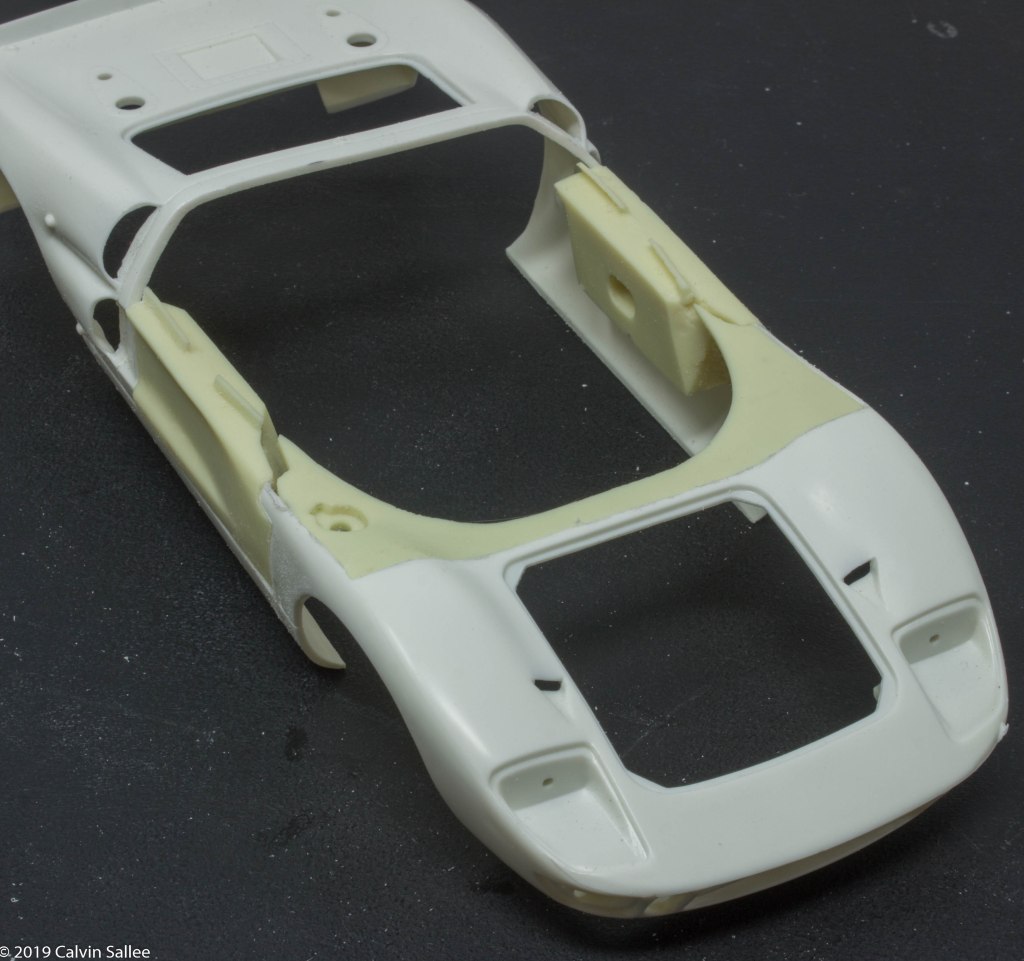
Converting the Fujimi kit:
This conversion will require test fitting and adjusting. The main challenge is adjusting all the new resin parts to fit together.
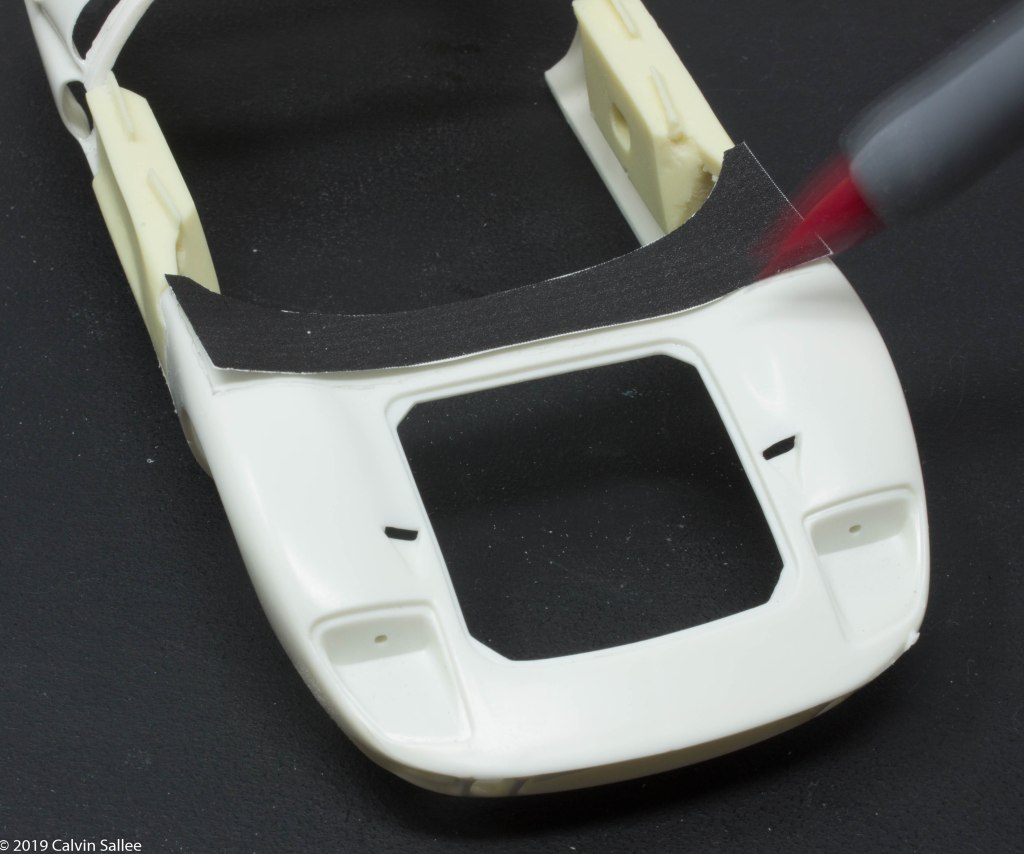
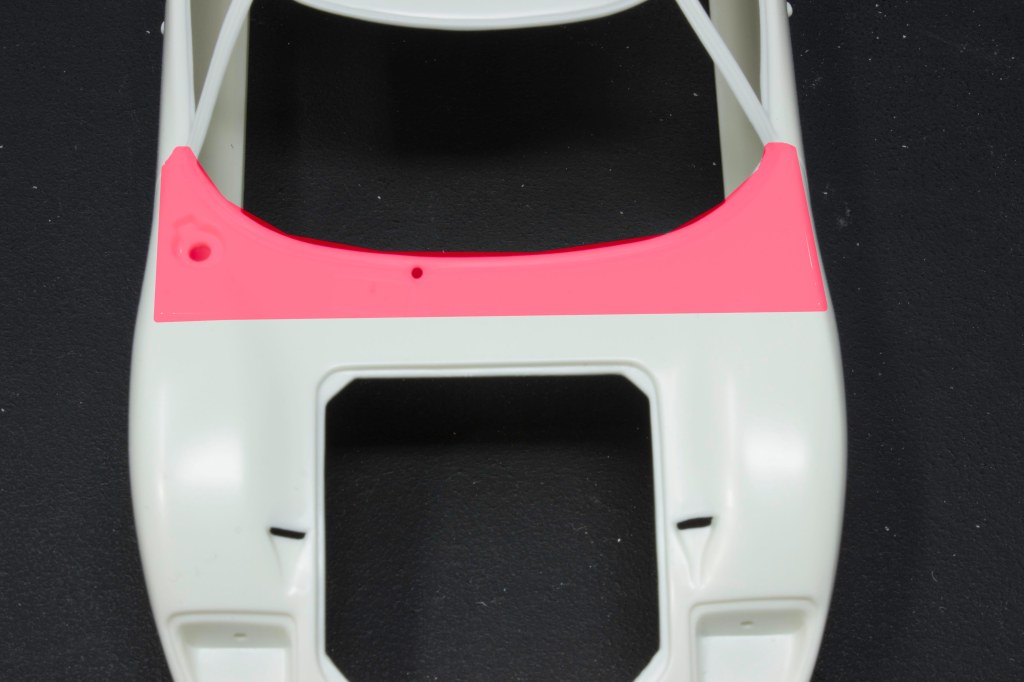
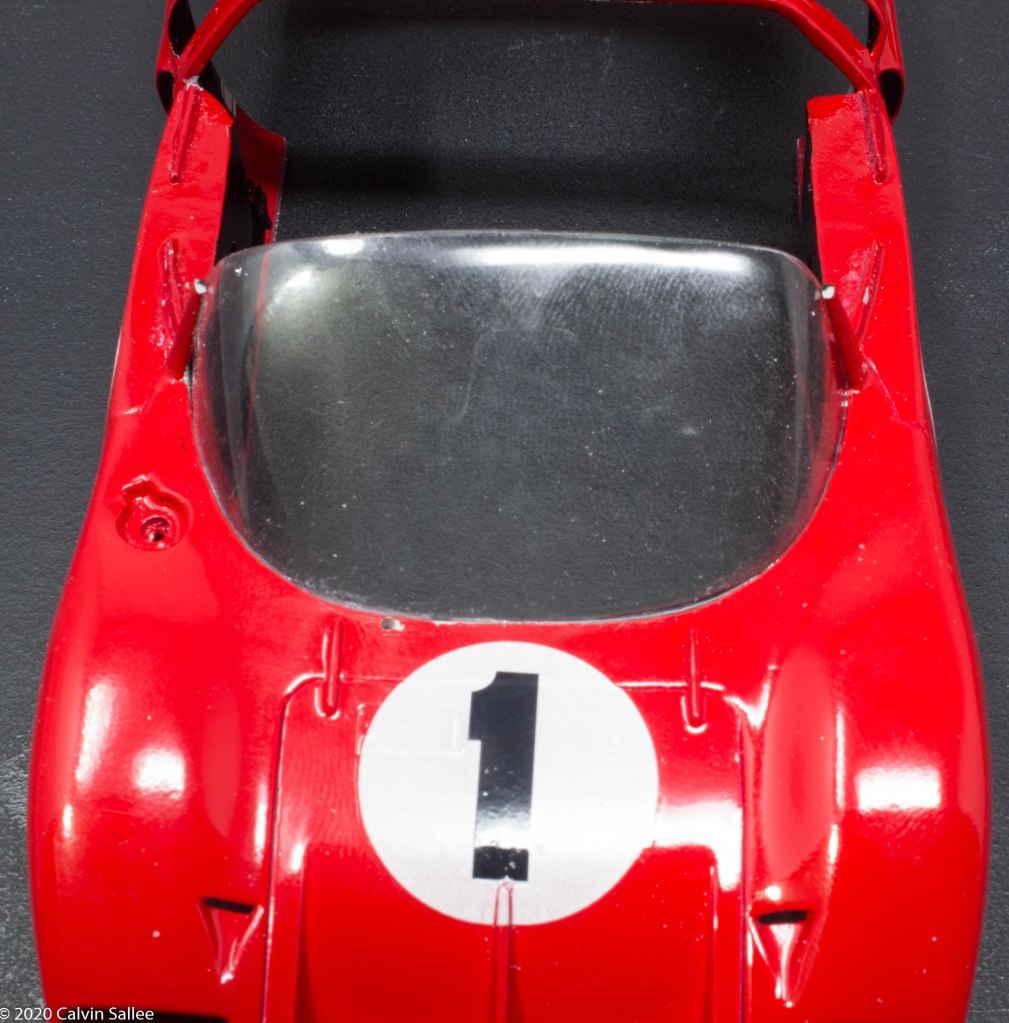
The X-1 had a smaller windshield than the regular GT-40.

The red highlighted sections need to be removed.

Its best to grind out the area a little undersized than pushing it to the limit. Prepare your resin doors before finishing off the cutout on the Fujimi kit, to make sure you don’t cutout the sections too big. Take your time and observe all the edges and edges.
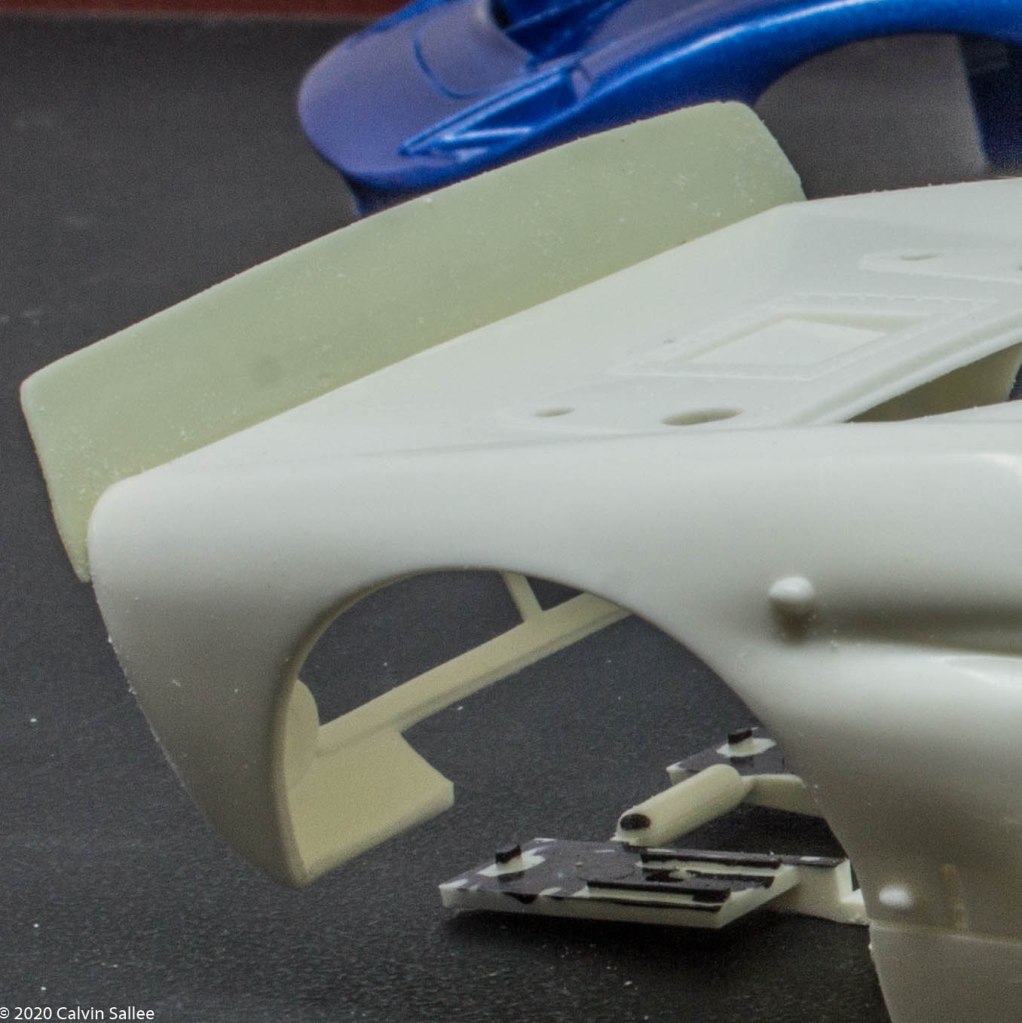
Super Glue the Resin doors into place the best you can. This resin conversion depends a lot on how well you cutout the areas to fit the new resin parts. If you are unsure, do more test fitting and studying how it all looks. The reason why I recommend gluing the resin doors into place first, as it helps you cut and line up your next step of adding the resin base for holding the windshield into place.
After the superglue dries on the resin doors, use the template for the windshield base and draw out the outline of the area that needs to be cutout. Be sure to cut WITHIN the lines you mark out.
Take the side windshield post and get familiar with how the need to be mounted. I recommend test fitting them up with the clear Vac-U-form windshield into place. I recommend gluing the windshield post into place and there is no seam at the bottom and needs to blend into the rest of the bodywork. I wouldn’t glue the top windshield molding into place until the whole car is painted and the clear vac-u-forum windshield is glue into place.

Remove the rear spoiler by carefully using the Dremel and grinding the spoiler off, then use a file to sand the rest of the spoiler off flush with the rest of the body.

After the original kit spoiler is sanded smooth off. Glue on the new taller Resin rear spoiler.
Painting:
Preparation work before painting the color onto the body is the most import step in painting.
Making sure the new resin parts are cleaned scuffed is very important. YOU MUST scuff and clean the body thoroughly. First knock down and high edges with a low grit sand paper and work down to a fine grit. Then going through the process of primer the body and fixing imperfections is the norm…
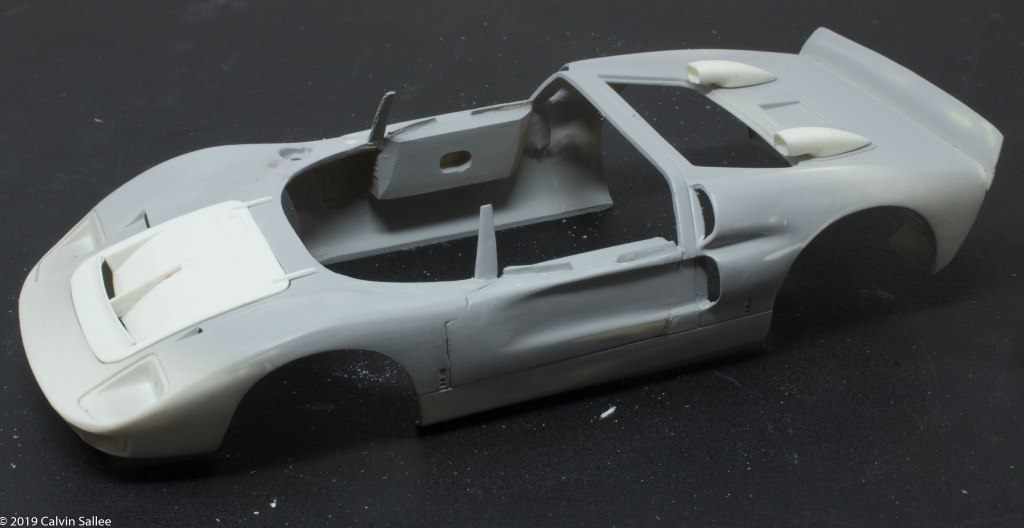
I recommend using Tamiya Gray surface Primer, first on the critical areas to workout any imperfections The areas that have been modified are naturally going to have problems occur with contamination and un-level areas. Spray a light coat of Tamiya Grey Primer over these modified areas to uncover the problem areas. Sand or fill any areas that need to be addressed. This could take multiple times of working over. Making sure the surface is smooth and clean is the most important part of the paint job. Having a good base, will yield great finished results.
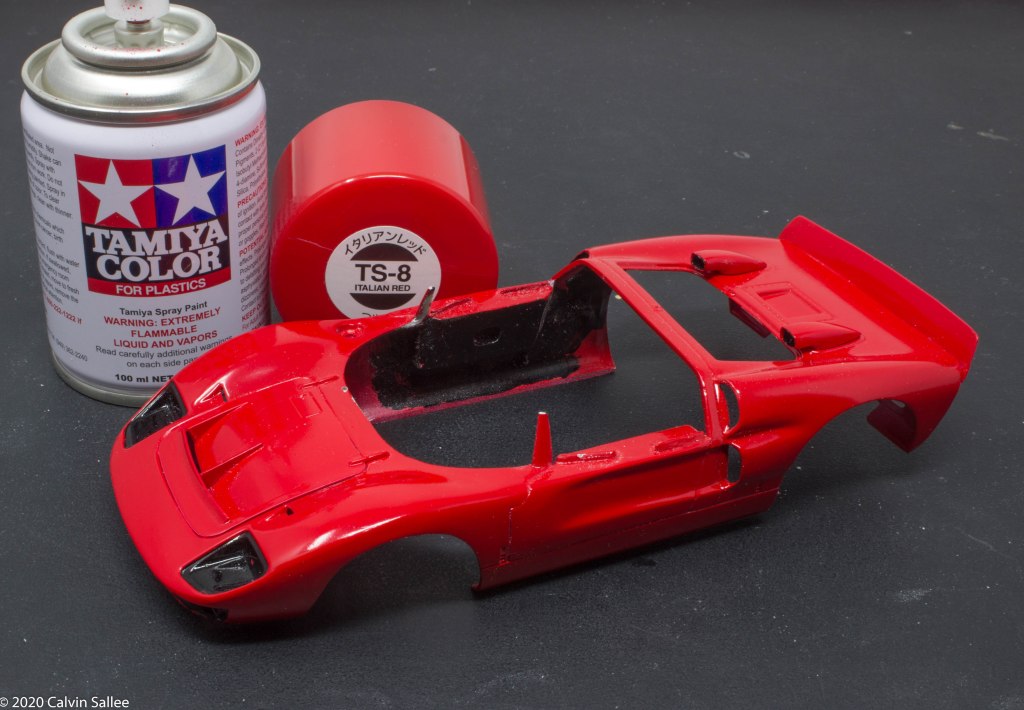
I recommend using Tamiya TS-8 Italian Red for the shade of color.
Details:
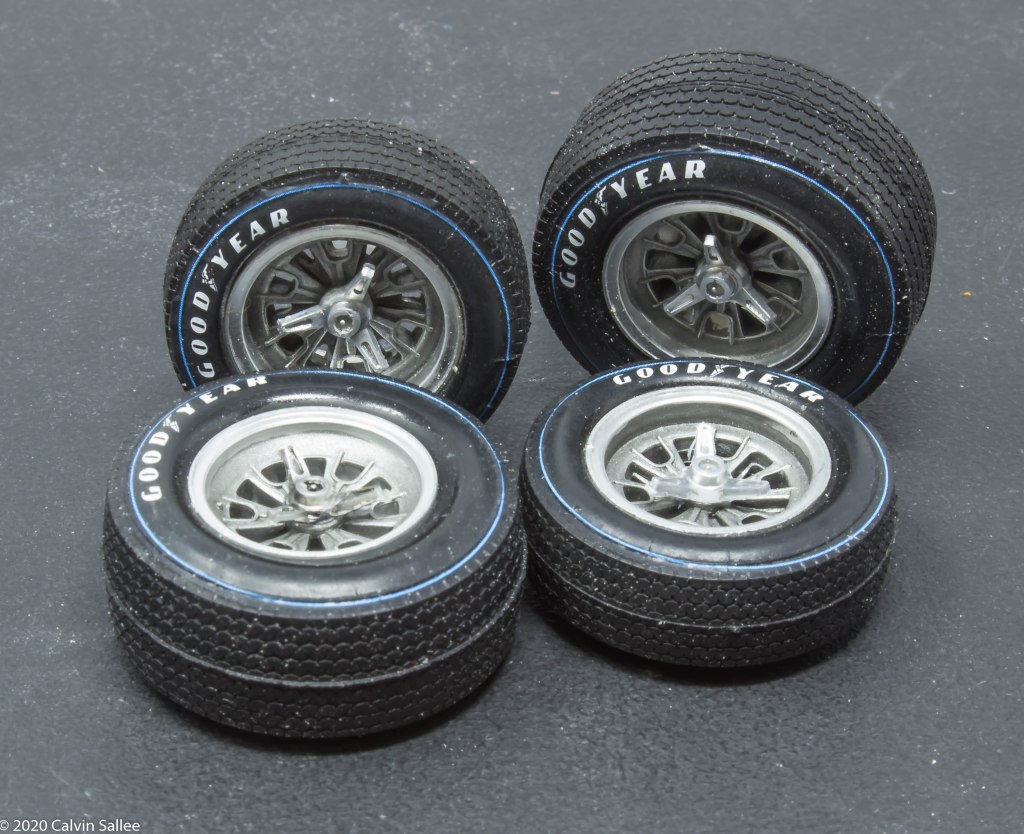
I recommend Indycals Blue Ring Sports Car Tire decals 1/24 scale high profile tires fit 1/24 Fujimi GT 40 tires available HERE

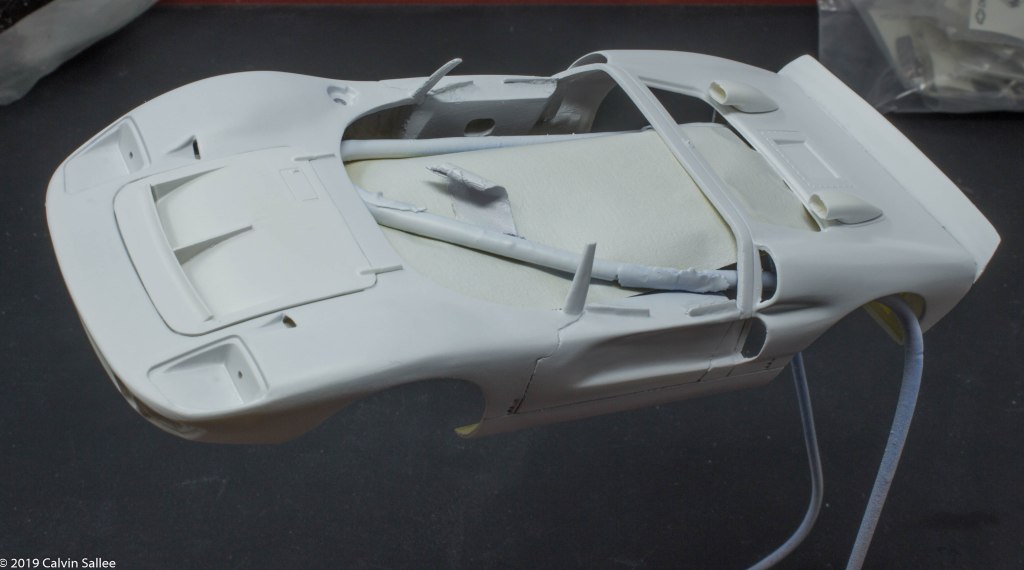
Use Apoxie-Sculpt to fill in the hole pattern on the kit seats. The X1 didn’t have this type of seat.
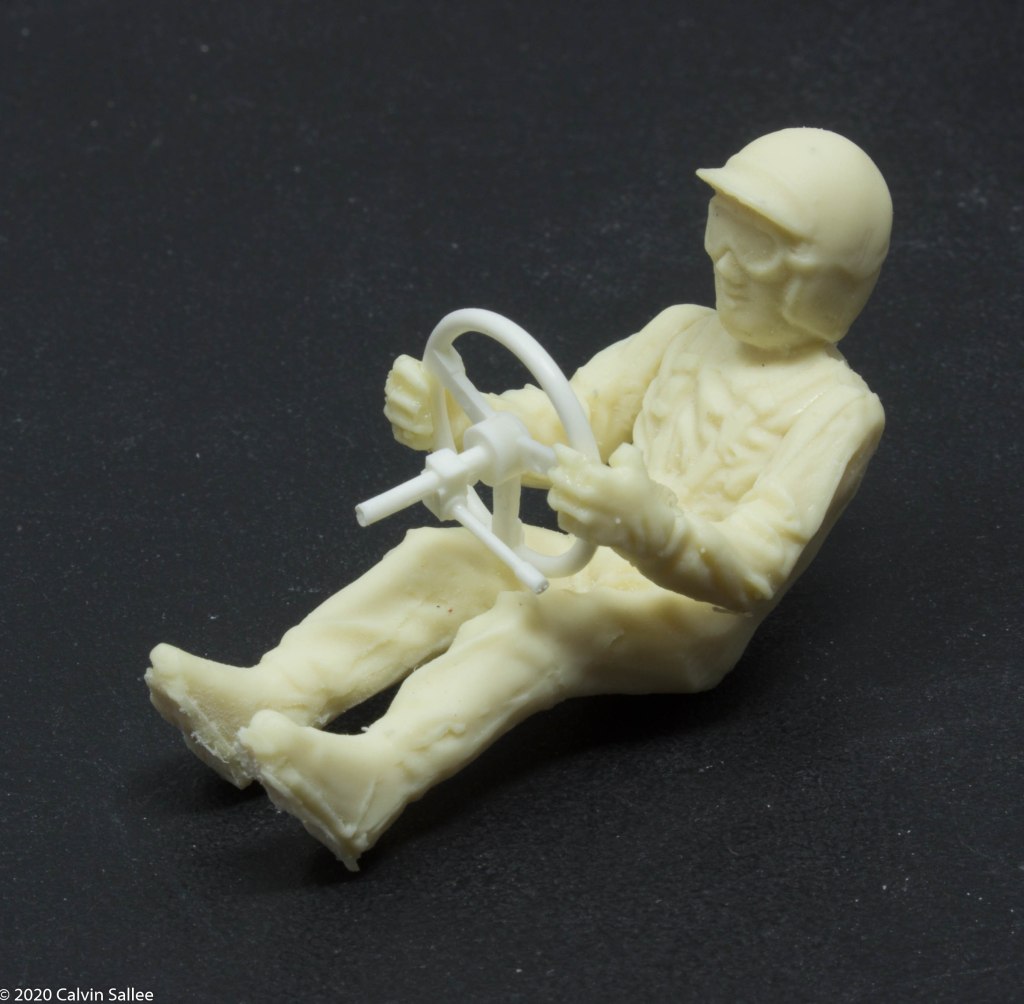
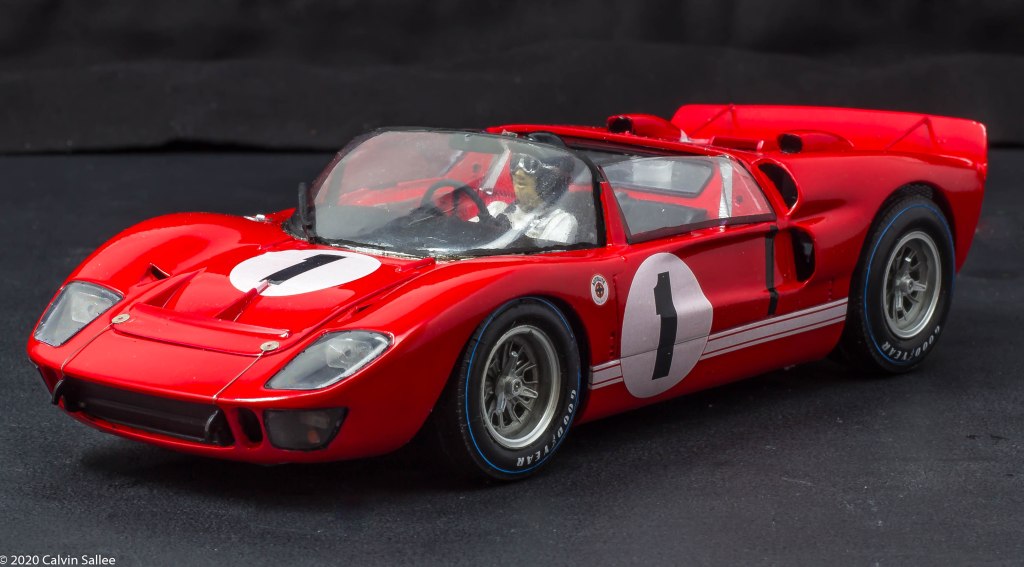
One of the exciting details about this conversion kit is the addition of a resin driver figure that ha the likeness of Ken Miles! Since this is an open cockpit roadster the interior details are important and I felt it was important to put the late Great Ken Miles in the driver seat. This is the first time I’ve offered a driver figure.

Apply the Indycals decals to the body using Walthers Solvset decal setting solution
Before applying the vac-u-form windsheild I gave the body 3 coats of clear coat to help protect the red paint job and the decals.

Cut vac-u-form windshield out using smaller scissors. Its not critical to cut the bottom of the windshield out precisely, its recommend to leave a little bit of excess on the bottom. It is important to cut the sides and top precisely.
When applying the vac-u-form windshield its import you plan out how you are going to glue the windshield into place. This is the most complicated part of the build. I recommend super gluing the front center part of the windshield into place, first. Let dry and super glue the sides into place, last. I used a combination of super glue and CA thin glue. These are both very risky to use on clear parts but I always choose to strong glues with these complicated situations.

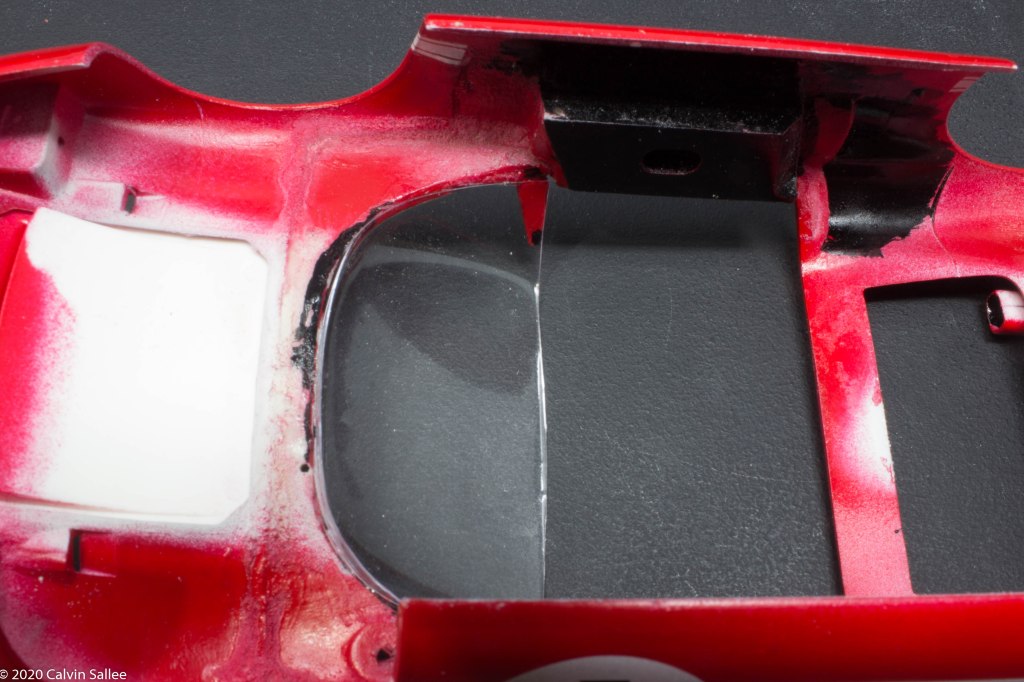
Super glue the Dash assembly into place. This fits in the original place of the original kit dash. The front end of the chassis was painted blue, which isn’t necessarily important as you can barely see the area up front when the body is on. The rear firewall is painted red, the same color as the body. The fuel takes are aluminum color.
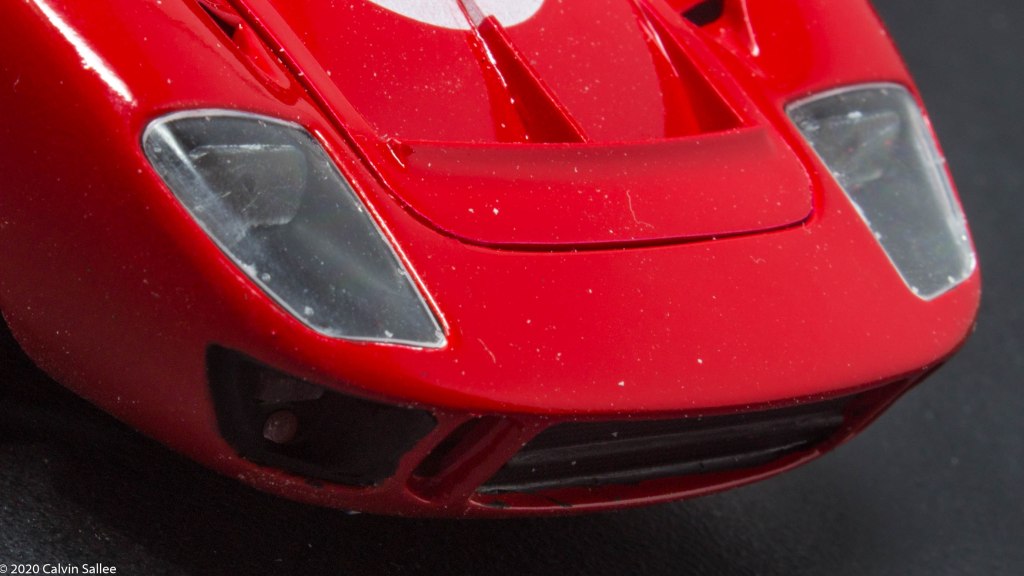
One important detail to apply to your kit is as simplet as using a Black Ink marker on the side egde of the clear headlight covers. As you can see in the picture above the edges of the clear headlight covers has a white edge that doesn’t make the look of the model look very attractive and unrealistic.

Simply take any ink marker and darken the side edges of the clear plastic. This will eliminate the white look around the edge.
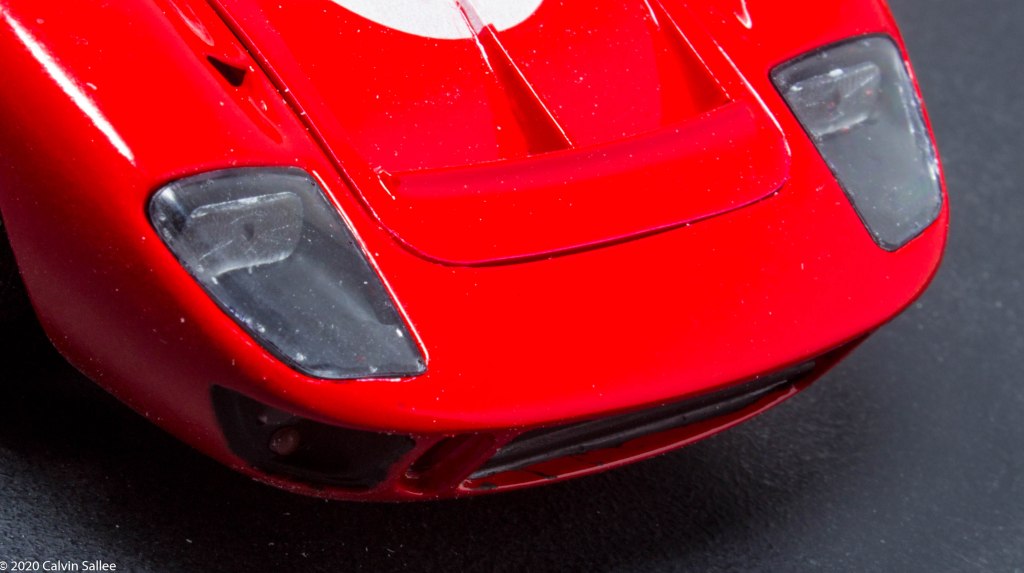
As you can see in the picture above the white edge is eliminated and helps give the model a more realistic look.
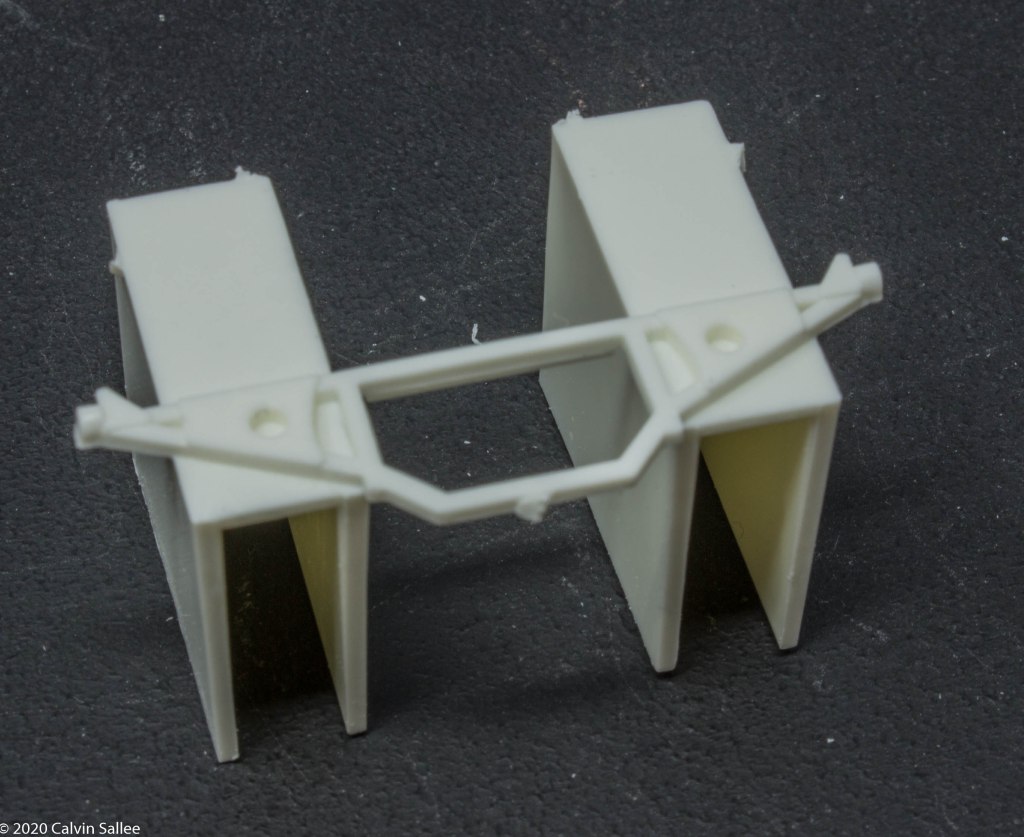
One interesting rule change was the cars did NOT run the aluminum luggage boxes at Sebring during the race. There is a picture on the internet of Dan Gurney’s #2 car with luggage boxes, but there is no proof of when that was taken? But watching video and looking at many race day photos of many cars there was no sign of aluminum luggage boxes during the race itself.
So with that said, grind the luggage boxes off the rear brace section.

After grinding the luggage boxes off the rear brace, glue the rear brace onto the back end of the car. and on top of where the section where the luggage boxes would sit.
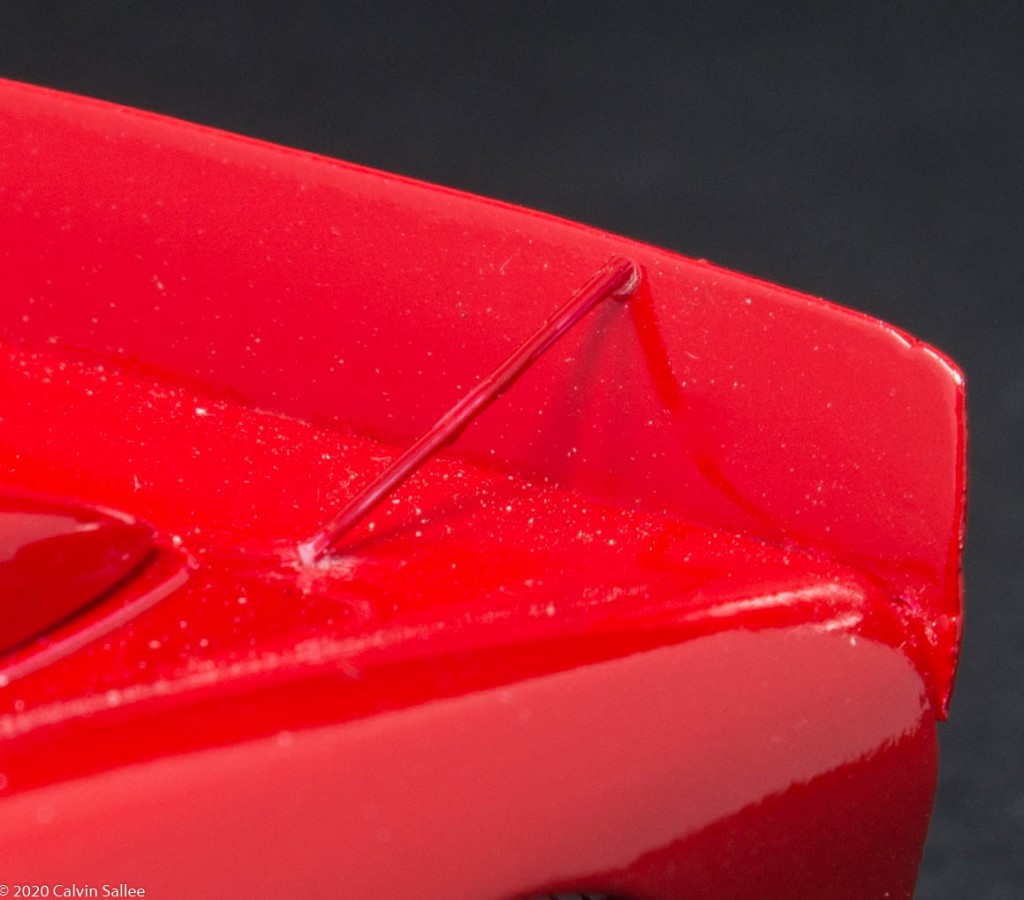
Use the small styrene rod supplied in the kit to make the rear spoiler supports.

Cutout the side window plates with the styrene sheet supplied in the kit and paint red.
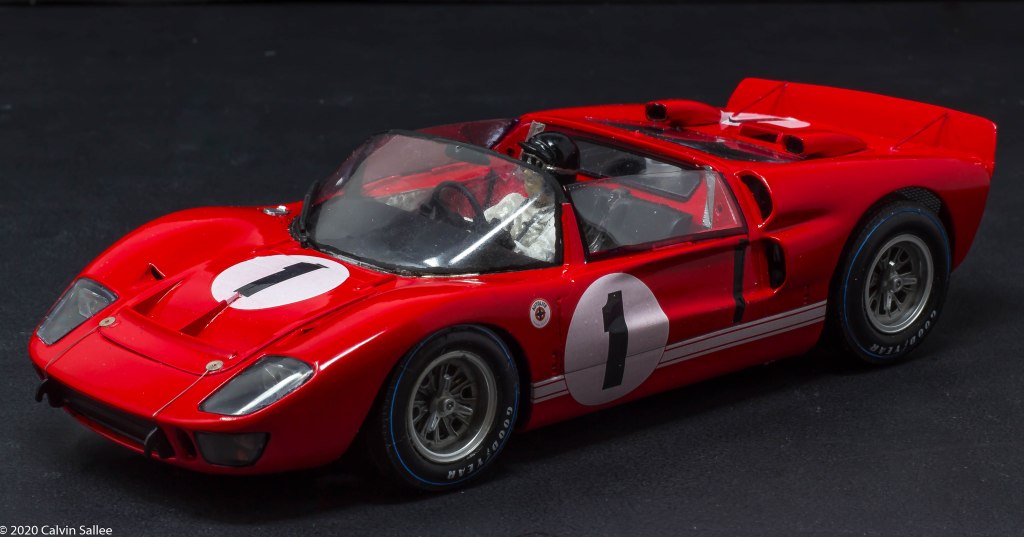
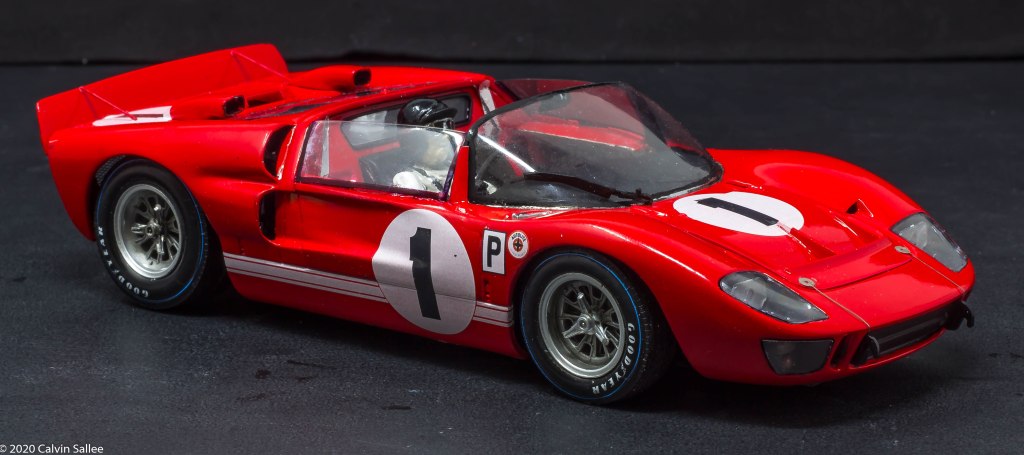
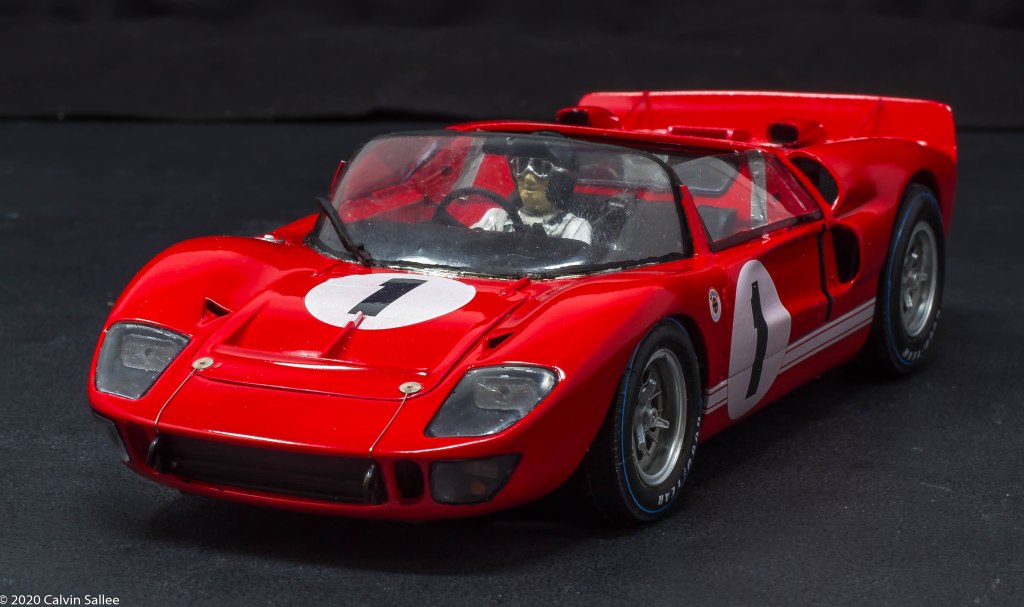
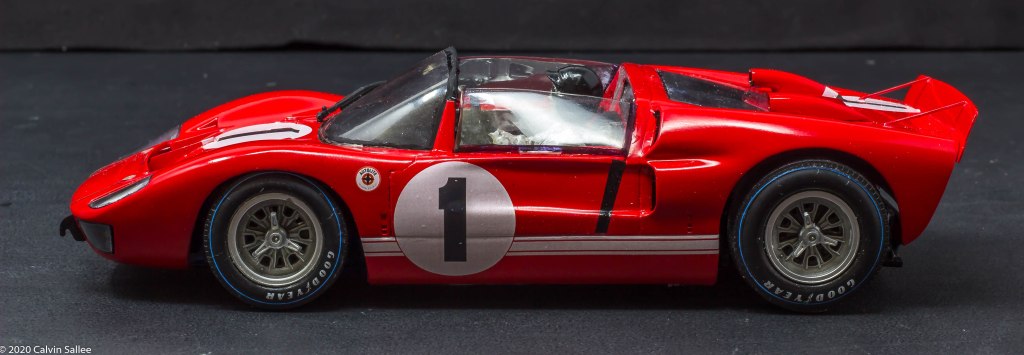
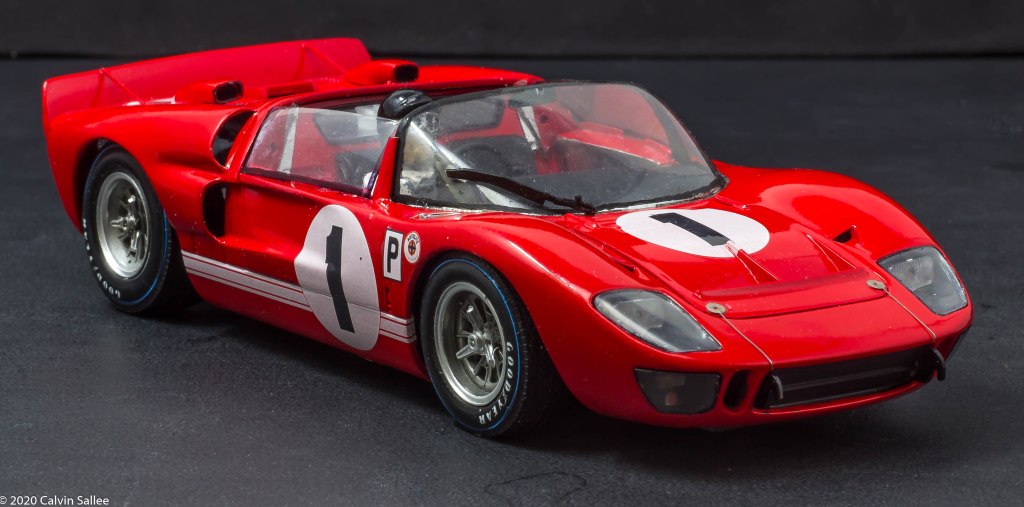
The finished car
After completing all the conversions on the Fujimi kit, the rest is the traditional buildup with the Fujimi instructions.


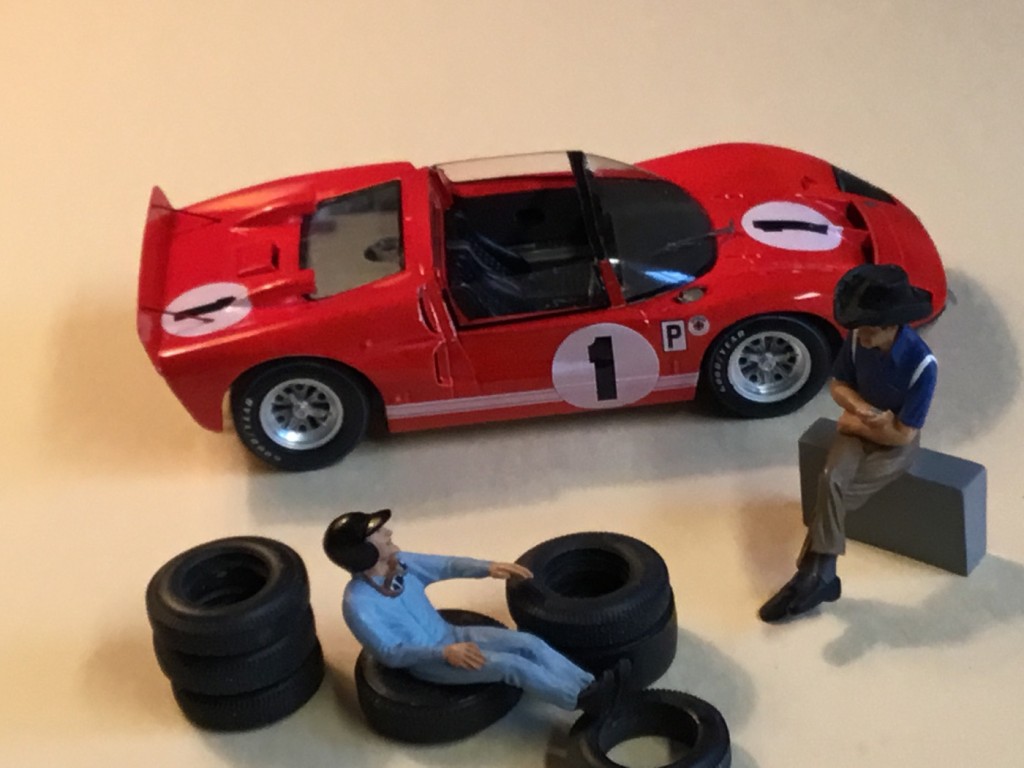
Customer Builds
A fantastic diorama of Ken Miles and Carroll Shelby chatting in front of the 1966 Ford GT40 X1 Roadster, built by Dan Parke

Build and picture by Dan Parke