In this blog post we will be using the 1/24 scale Fujimi or Revell Ford GT-40 MKII plastic kit and making the proper conversions to build the Shelby American Team from The 1966 24 Hour Daytona Continental, the very first 24 hours of Daytona.
About the cars…
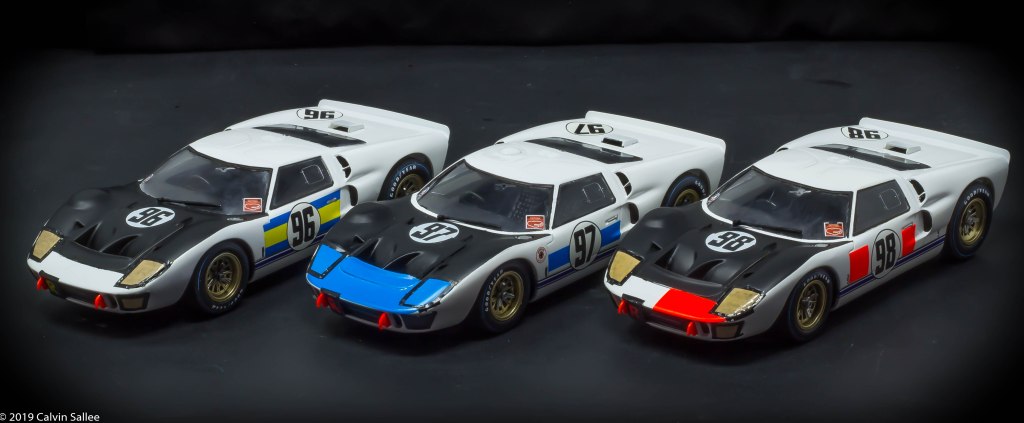
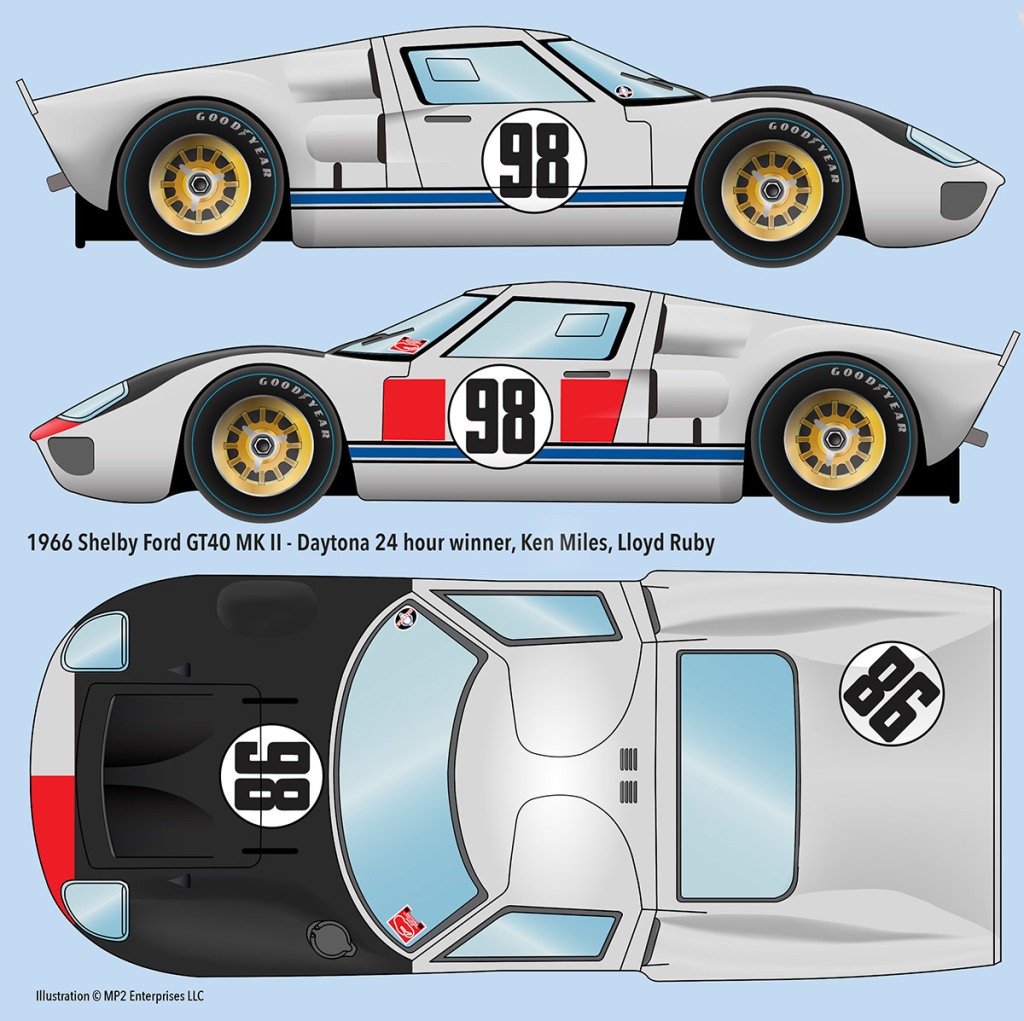
Ford was represented by two factory-backed teams at Daytona in 1966. Shelby American fielded three new GT40’s, now called the MKII and powered by 427-cubic-inch engines. Ken Miles / Lloyd Ruby, Dan Gurney / Jerry Grant, and Chris Amon / Bruce Mclaren were the driver pairings for the Shelby team.

The Conversion kit
What makes the Shelby cars from Daytona unique is the V-shaped hood with the aggressive depth of the radiator exits. Most of the Ford GT-40’s had to make a modification to the bodywork as the right front wheel was rubbing through the right front fender as the cornering speeds of the high speed high banks was enormous. SO a modification before the race was needed. There are some pictures out there on the internet that shows these cars with no fender humps, but its been confirmed that it was practice shots and NOT race-day shots. You can Purchase a Resin conversion kit off my website HERE


The Plastic kit
The first Ford GT-40 MkII Kit from Fujimi was 1989 and has been re-issued dozens of times in different schemes. You can find many Fujimi Ford GT40 MKII kits on ebay HERE.
-

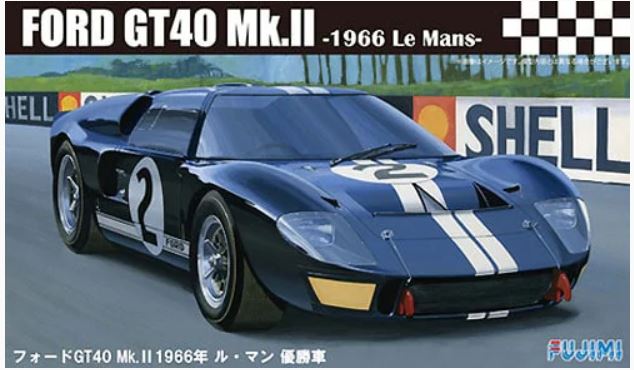
Ford GT-40 Mk.II
1966 Le Mans Winner
Fujimi – No. 12101 – 1:24 -
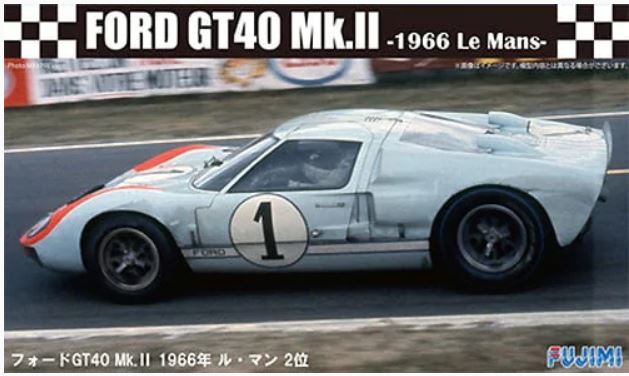
Ford GT-40 Mk.II
1966 Le Mans 2nd
Fujimi – No. 12102 – 1:24 -
Ford GT-40 Mk.II
1966 Le Mans 3rd
Fujimi – No. 12103 – 1:24 -
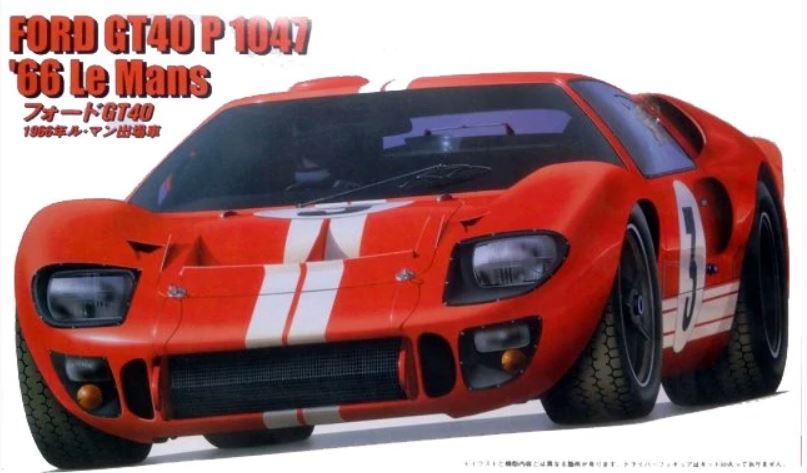
Ford GT40 Mk.II P 1047 ’66 Le Mans
Fujimi – No. 12129 – 1:24 -

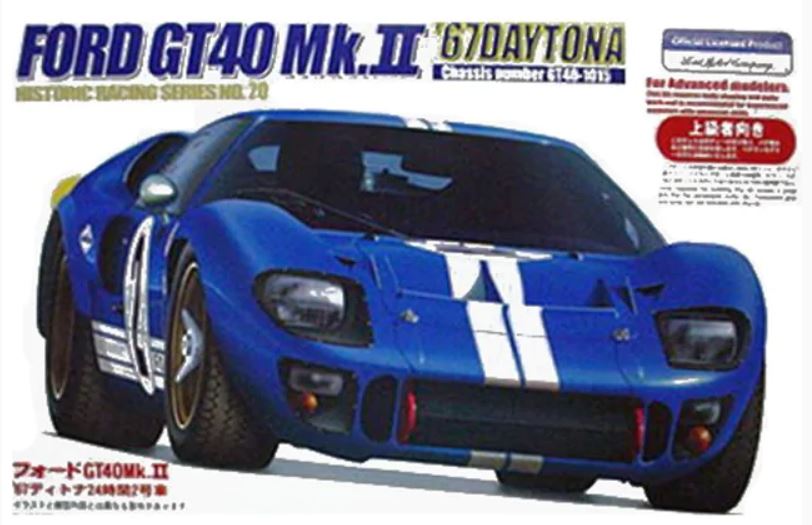
Ford GT40 Mk.II ’67 Daytona
1
Fujimi – No. 12139 – 1:24 -
Ford GT40 Mk.II ’67 Daytona
#2
Fujimi – No. 12148 – 1:24 -

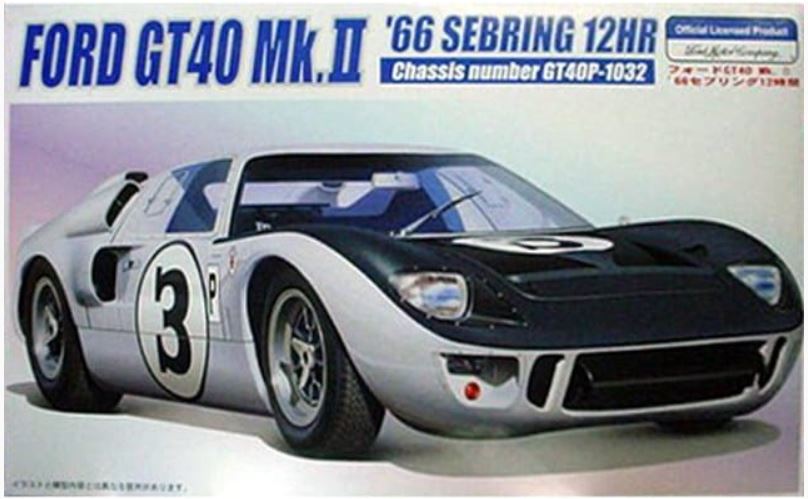
Ford GT40 Mk.II ’66 Sebring 12HR
Fujimi – No. 12158 – 1:24 -
Ford GT40 Mk.II ’66 Sebring 12HR
Fujimi – No. 12159 – 1:24 -
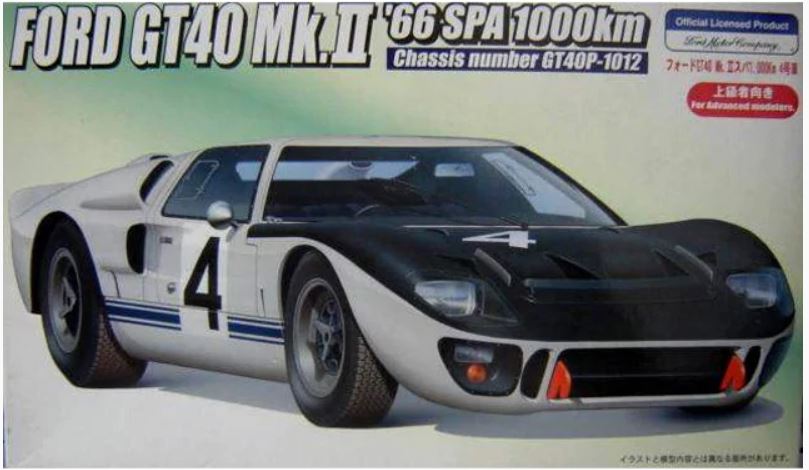
Ford GT40 Mk.II ’66 Spa 1000km
Fujimi – No. 12160 – 1:24 -
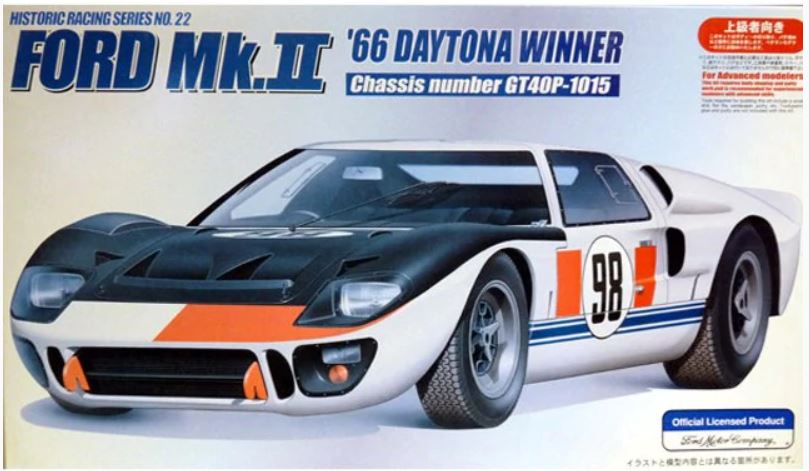
Ford GT40 Mk.II ’66 Daytona winner
Fujimi – No. 12161 – 1:24 -
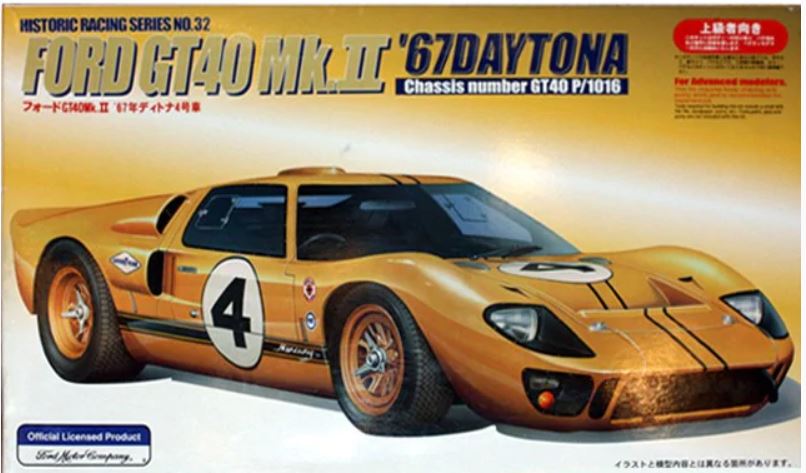
Ford GT40 Mk.II ’67 Daytona
4
Fujimi – No. 12172 – 1:24 -

#2 Ford GT40
Revell – No. 7130 – 1:24 -

1966 Ford GT40 #98
Mk. II Daytona
Revell – No. 7131 – 1:24 -
Ford GT40 Mk-II `66 LeMans Winner
Fujimi – No. 12603 – 1:24 -
Ford GT40 Mk-II `66 LeMans 2nd
Fujimi – No. 12604 – 1:24
The Decals
Indycals offers all three Shelby American cars for the Daytona 24 hrs. Indycals has the most accurate set of decals for these cars. No other decal has the proper blue and black stripe on the side of the car, the correct decals on the windshield


The build-up
This section reviews how to use the resin conversion kit properly….
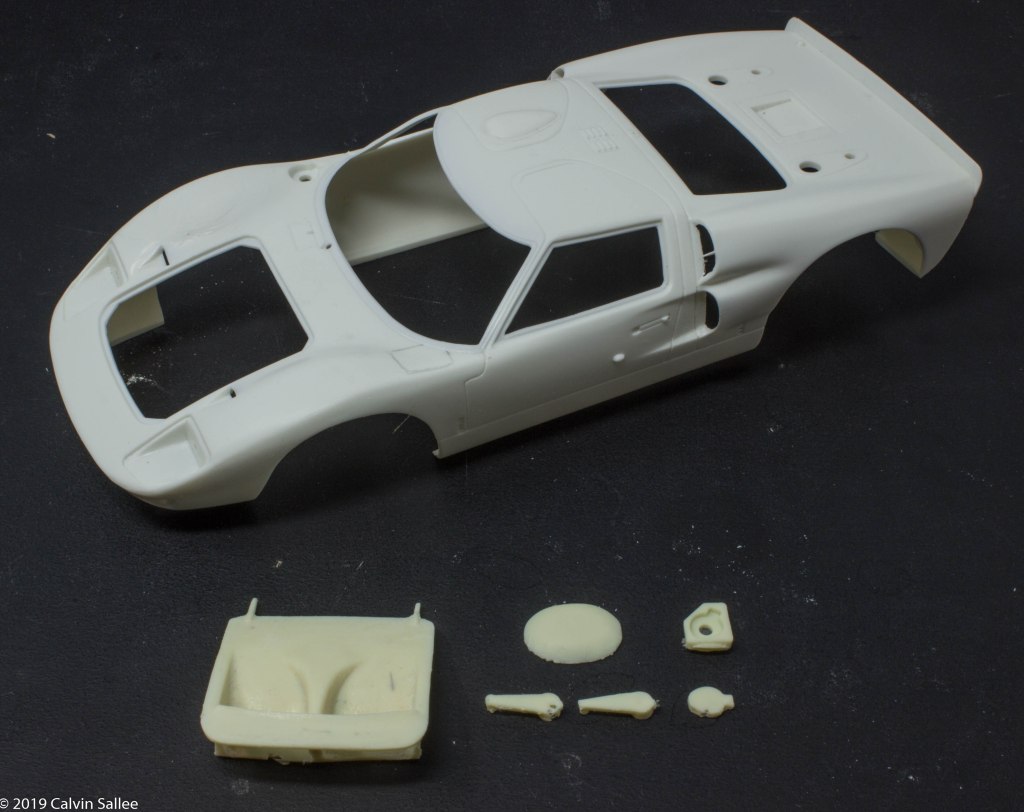
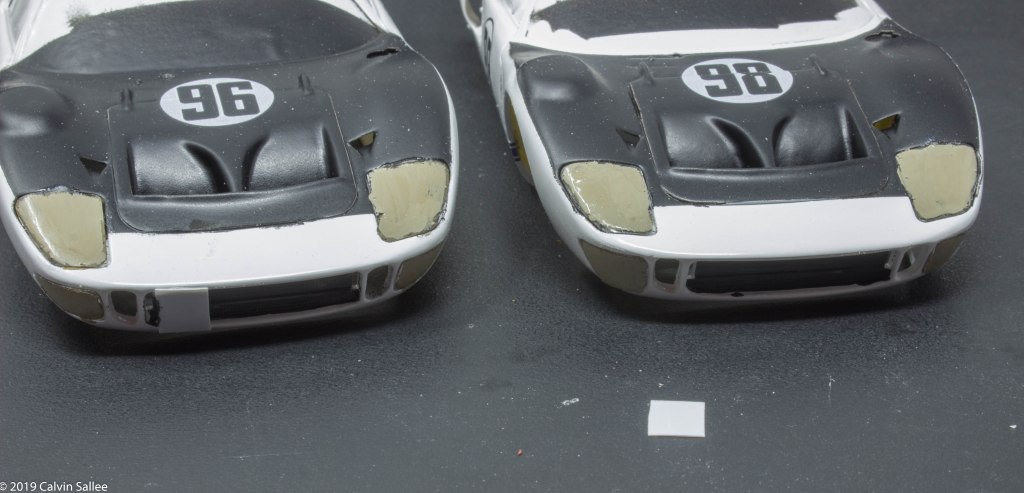
Fujimi/Revell did/does make the the #98 Miles/Ruby kit, BUT the hood its not totally accurate. the angles of the center V and the depth of the radiator exits is not as aggressive as it should in the Fujimi/Revell kit. Also the Fujimi right fender hump is not correct with a rectangle shaped fender hump. The real car had an oval like hump that is slightly rounded and semi flat on top.
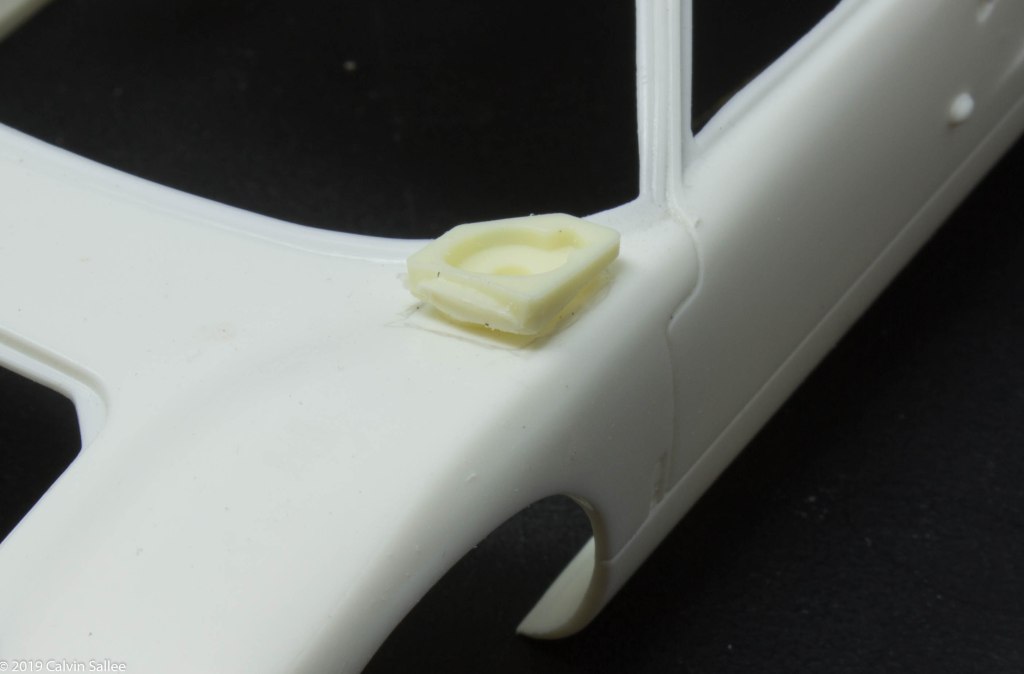
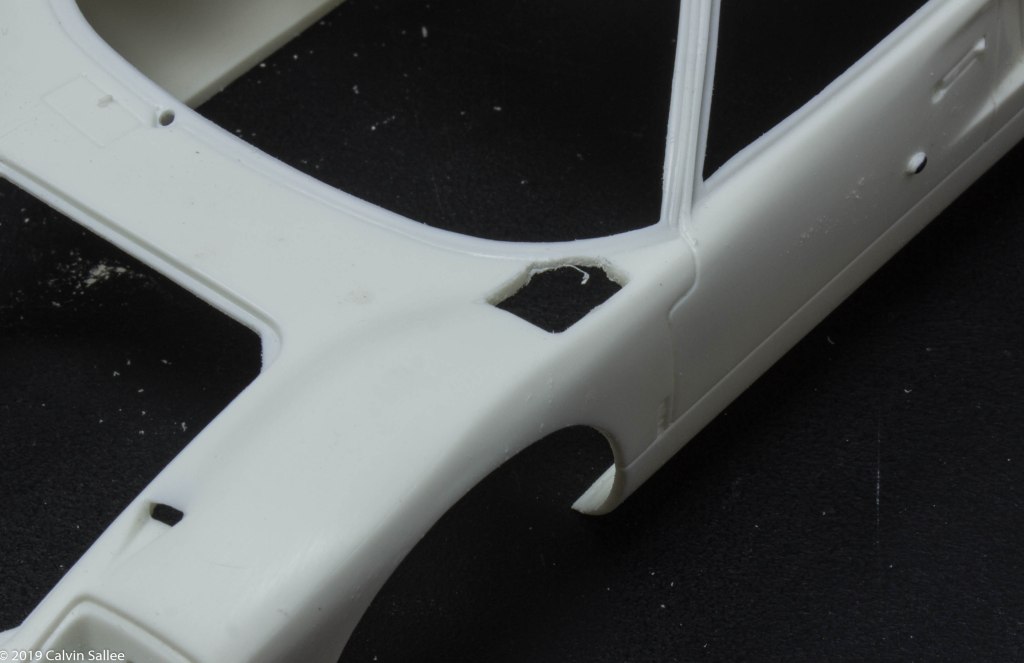
Using the resin fuel filler insert, trace out the outline of the resin part in the side corner of the under left side of the windshield. Then cutout the areas using a Dremel. This doesn’t necessarily need to be cut out perfectly, get it the best you can. You can use a sharp X-acto knife to finely cut out the edges of the cutout.

Superglue in the resin fuel inlet part into place to make sure its relatively flush with the body surface.
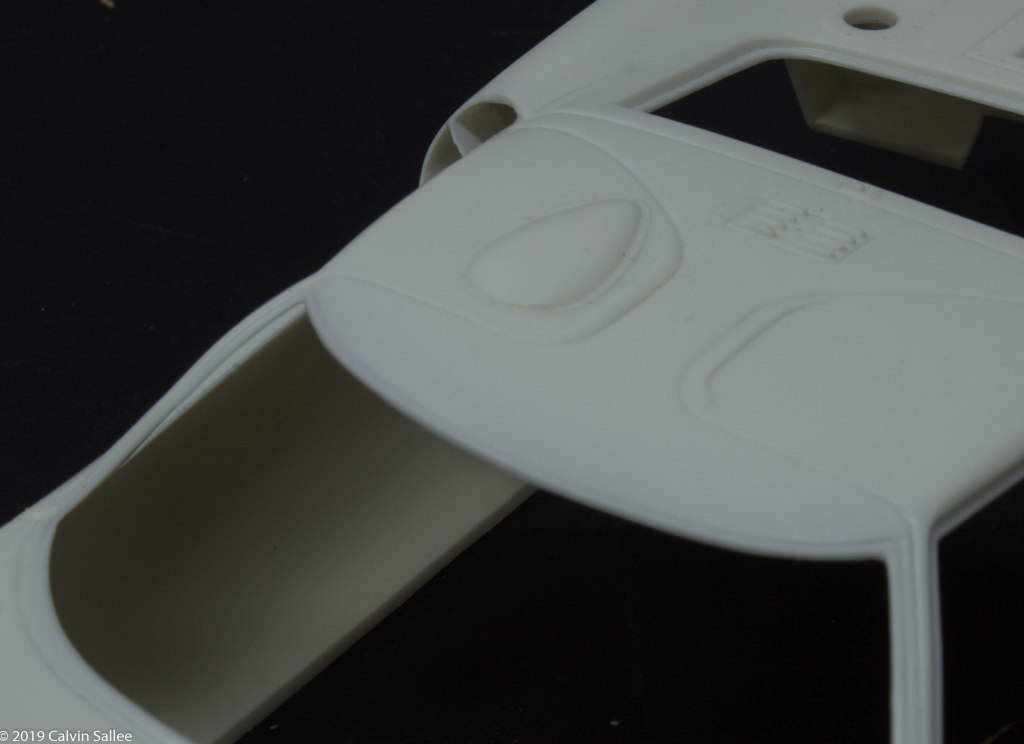
On the Miles/Ruby and Mclaren/Amon cars, there was no Gurney hump. BUT! If you are building a Gurney/Grant car, you will still need to grind off this particular Gurney hump. In early 1966 the Gurney hump was NOT a teardrop style of hump, but just a round hump at Daytona and Sebring. They didn’t make it teardrop style until Le -Mans
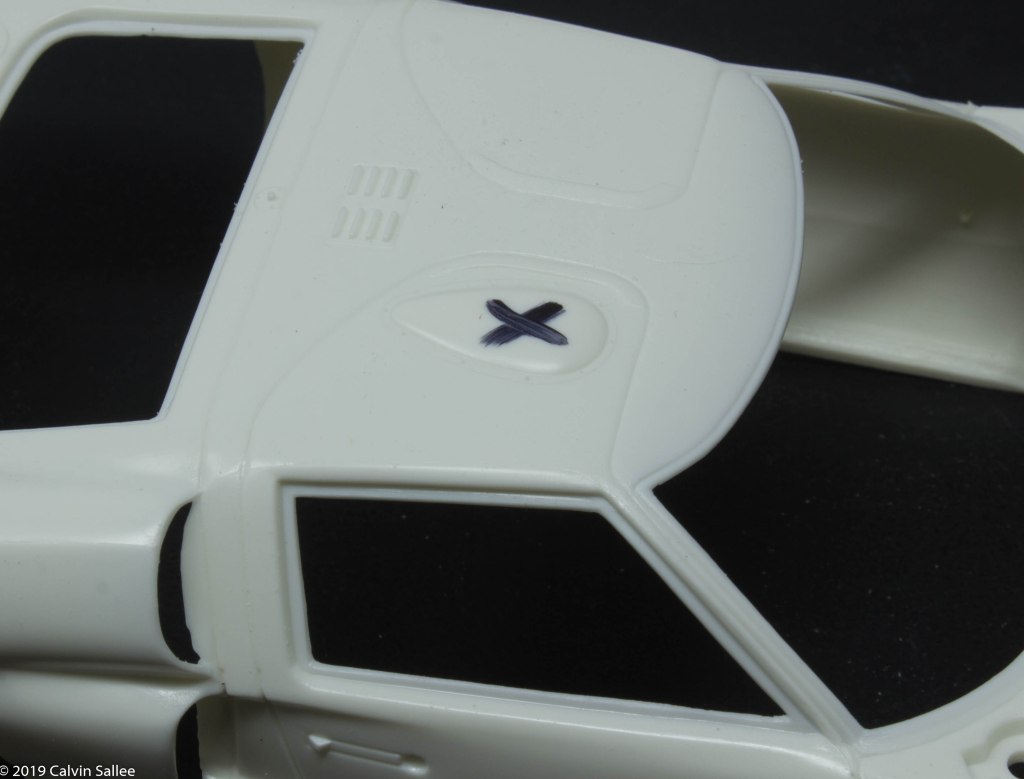
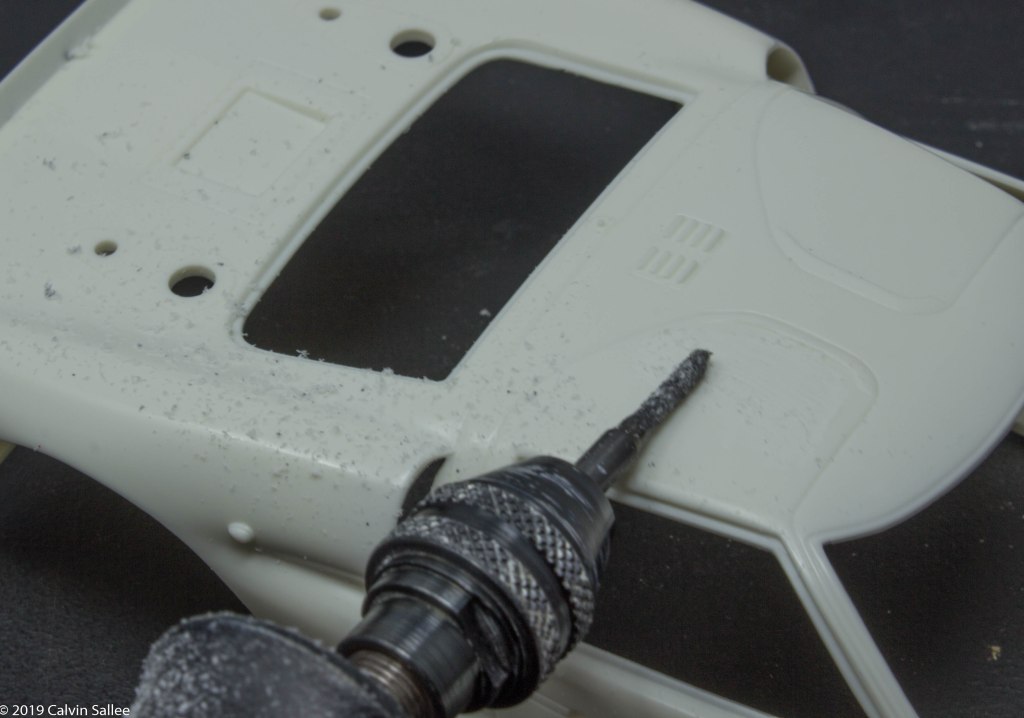
I recommend using the Dremel and grinding the teardrop Gurney hump off then take a sanding file to smooth off and level off the rest of the way.
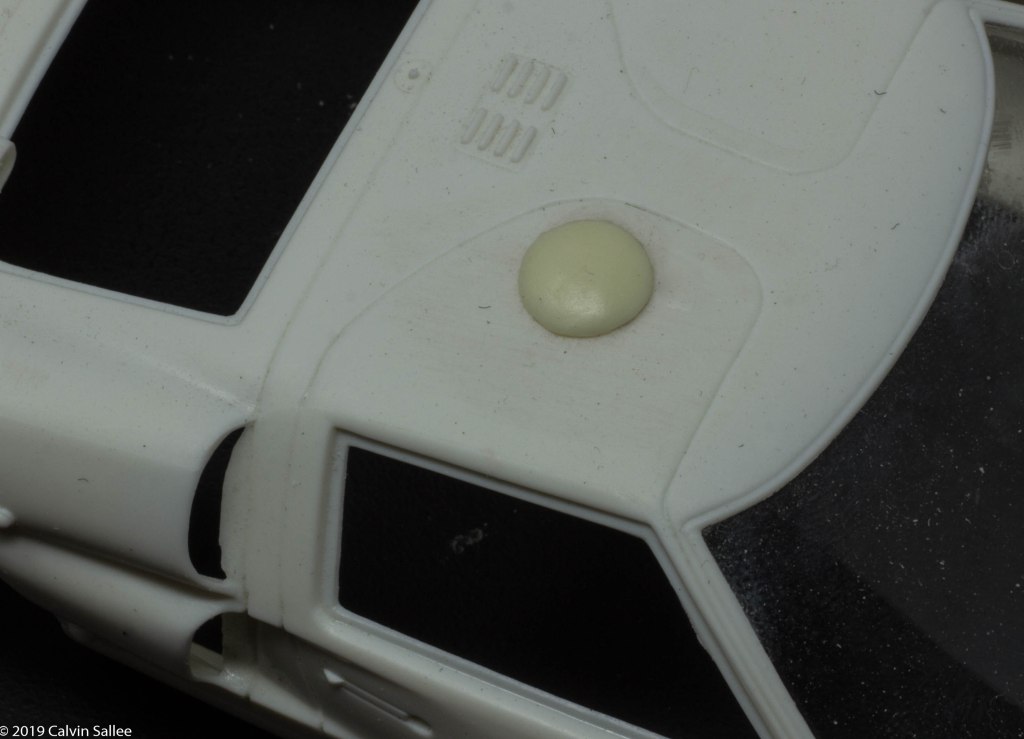
If you are building the Gruney/Grant car, go ahead and super glue the round Gurney hump into place on the top of the door roof. After research the hump was approximately in this location in the picture above.
Glue in the fuel plug on the right side. Since this race was at Daytona in a anti-clockwise direction, they fuel the car on the left side.
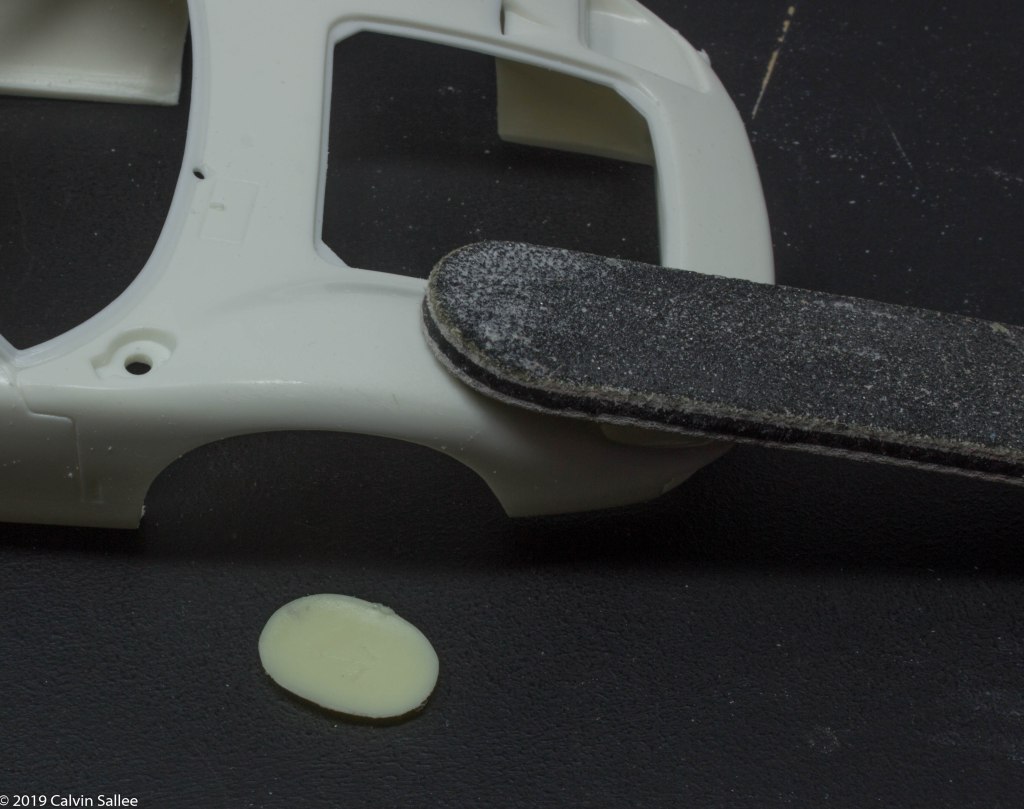
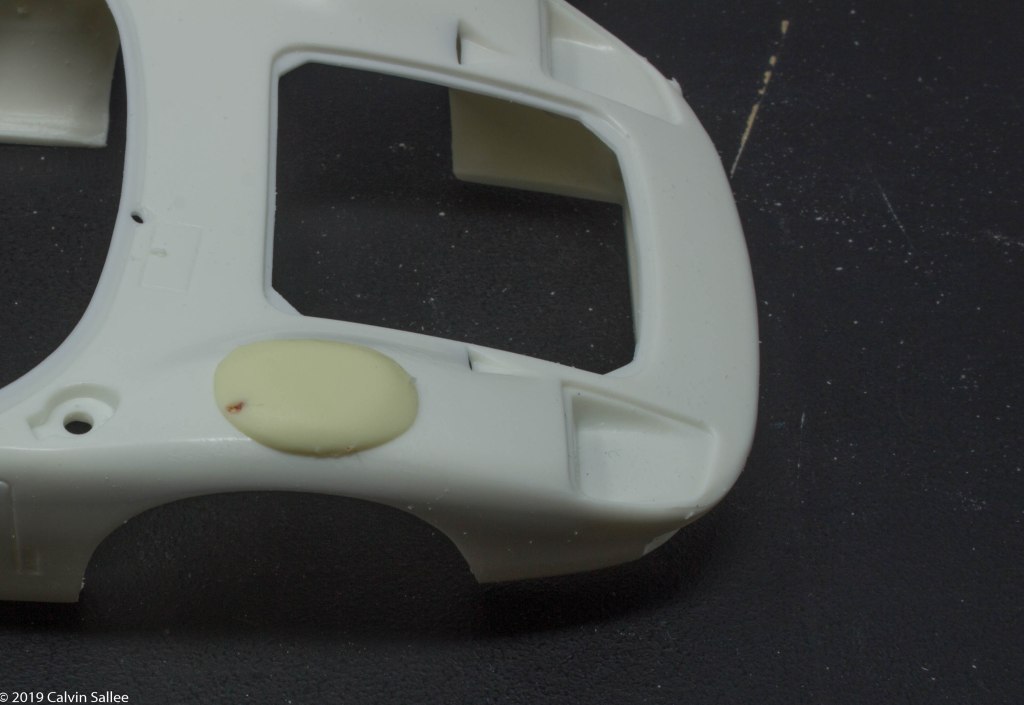
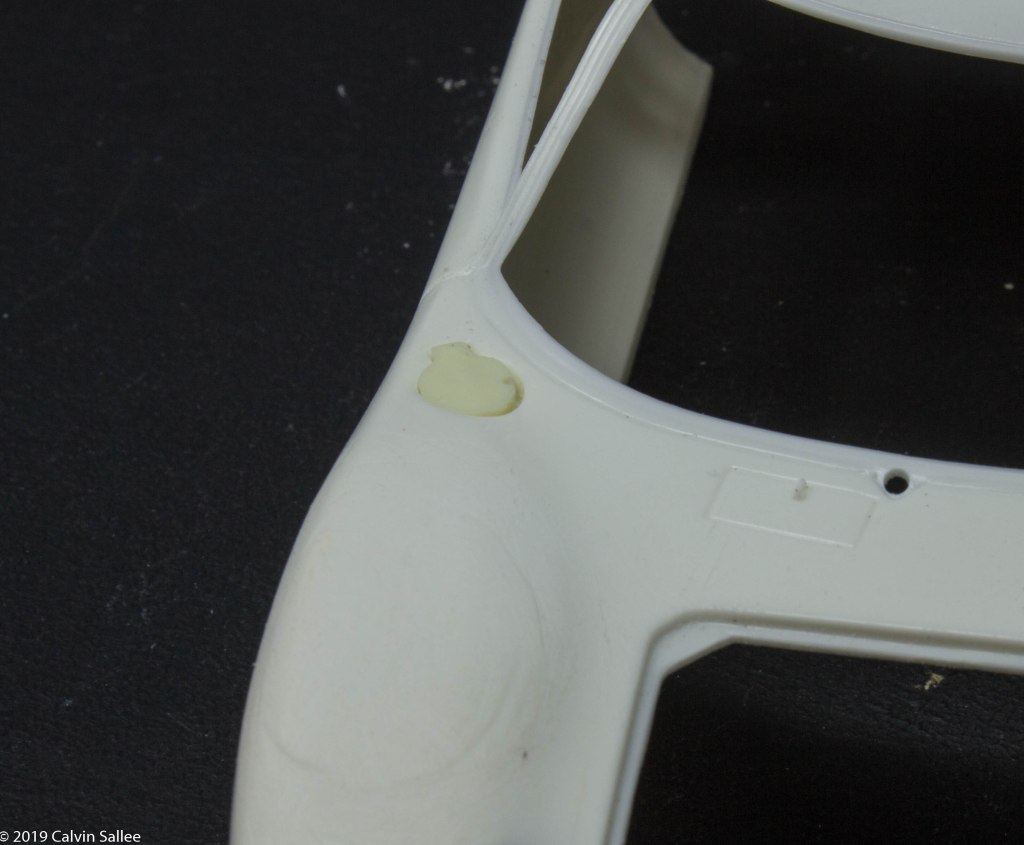
Take a sanding file and rough up the top of the right front fender for better superglue adhesion of the resin fender hump.
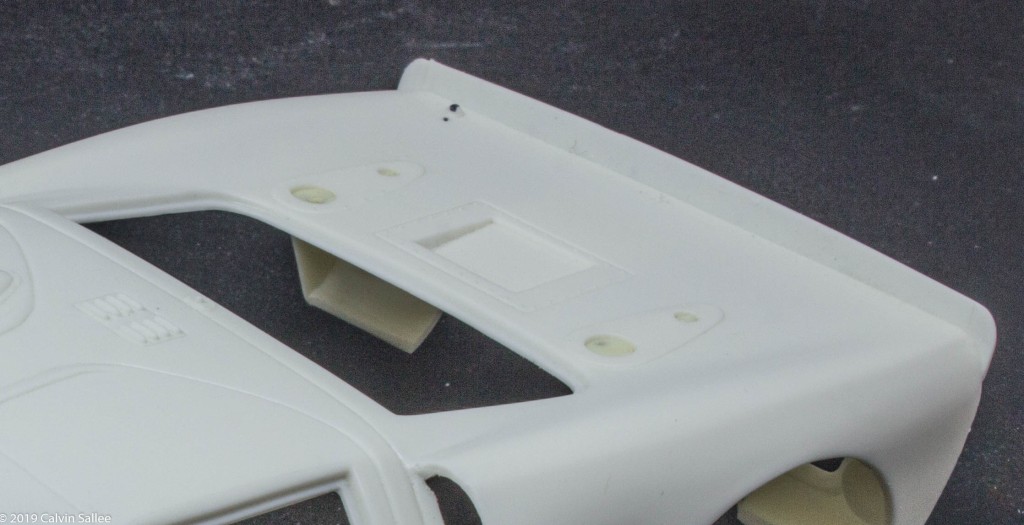
Insert the rear plugs from under the body for where the rear scoops would normally go. The Shelby cars at Daytona did not run the rear scoops. Sand down the mounting plates that are already molded to the body. After these are sanded down and filled there should be no evidence of there being anything in these locations.
Use 0.010″ thick white styrene to make the split in the air-scoop on the engine covers.

The painting
This section goes over all the painting details….

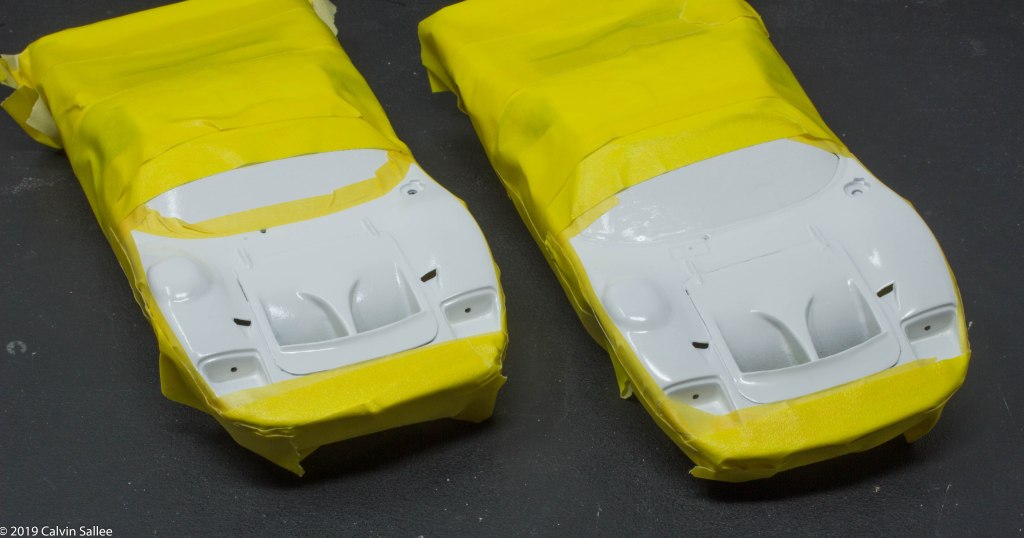
Its best to spray Tamiya grey primer over the resin areas to find any imperfections before covering the whole body in white primer. Grey primer is easier to see imprecations with and I find it best to spray the potential problem areas. If needed use Bondo spot filler to fill in any pin hole or gap that shows. Then re-primer until the imperfections are gone. Then give the whole body a nice coat of Tamiya White Primer.
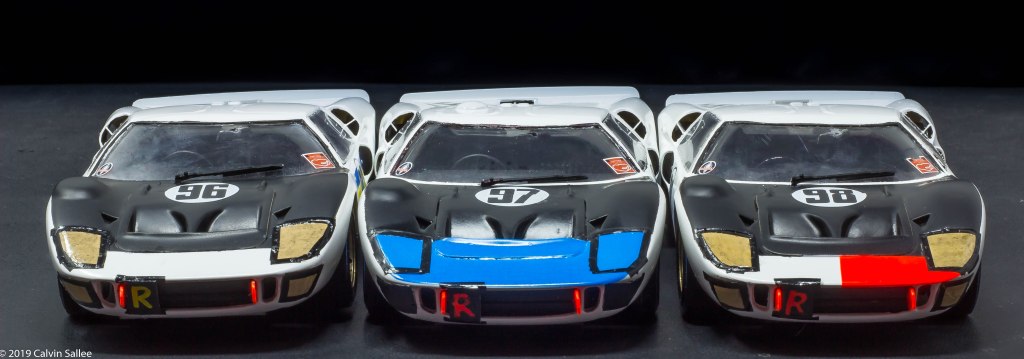
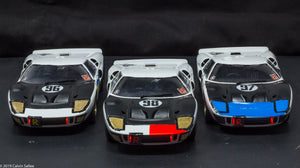
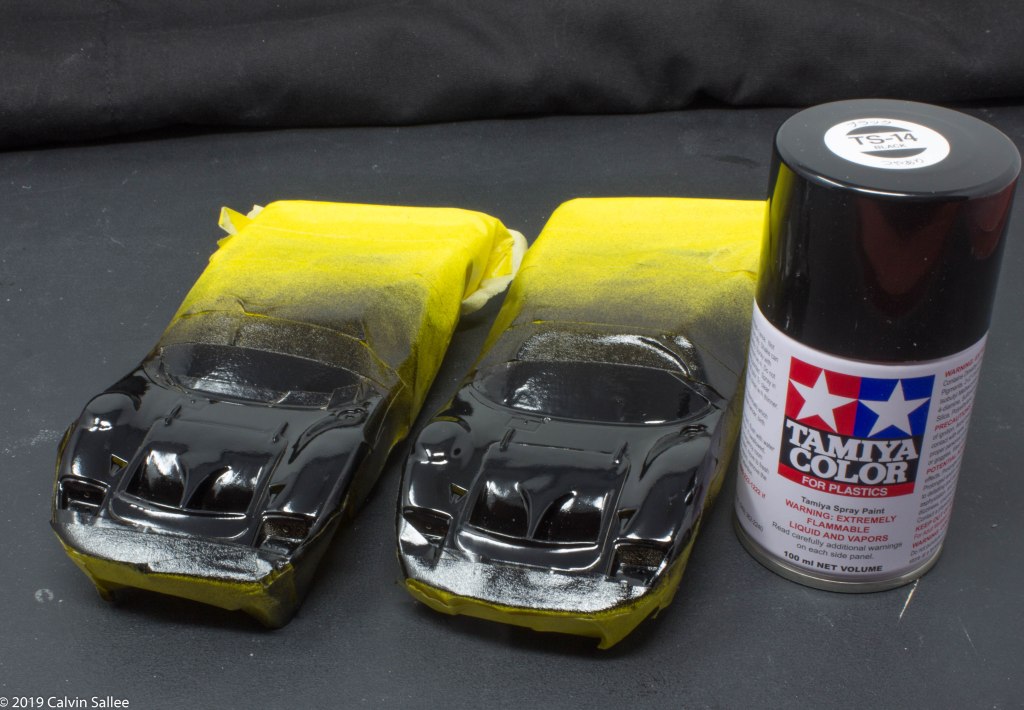
The one interesting thing about the Shelby cars is, the hood was flat black and the rest of the car was Gloss white. What makes this paint job different is it will be a little backwards in how it needs to be done.
Start off with using Tamiya TS-26 Pure White for the whole body.
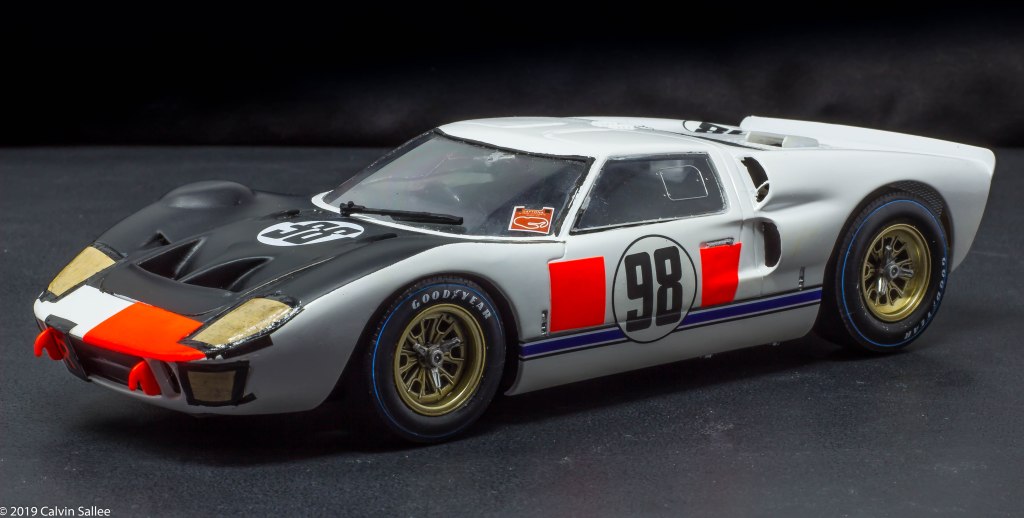
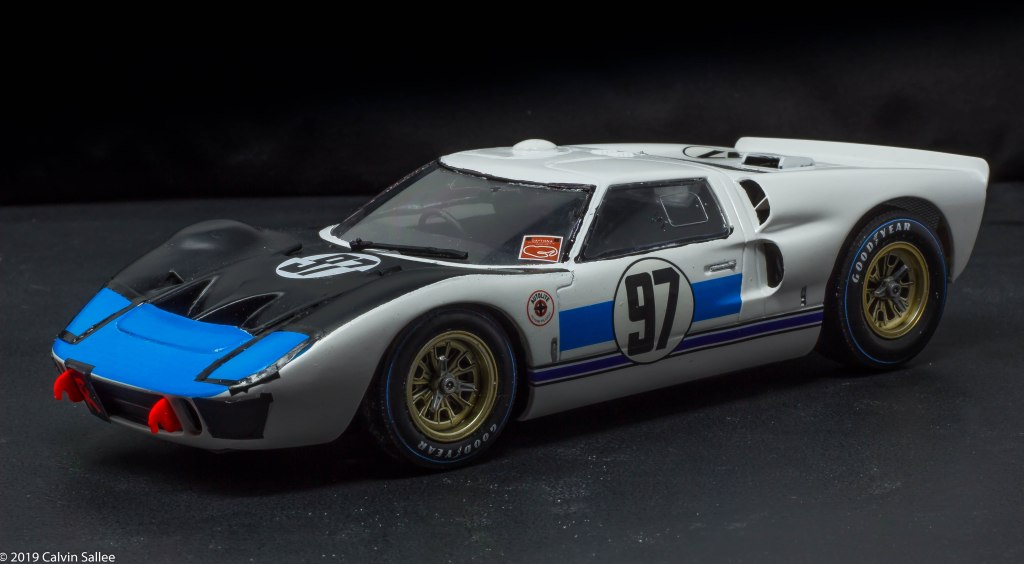
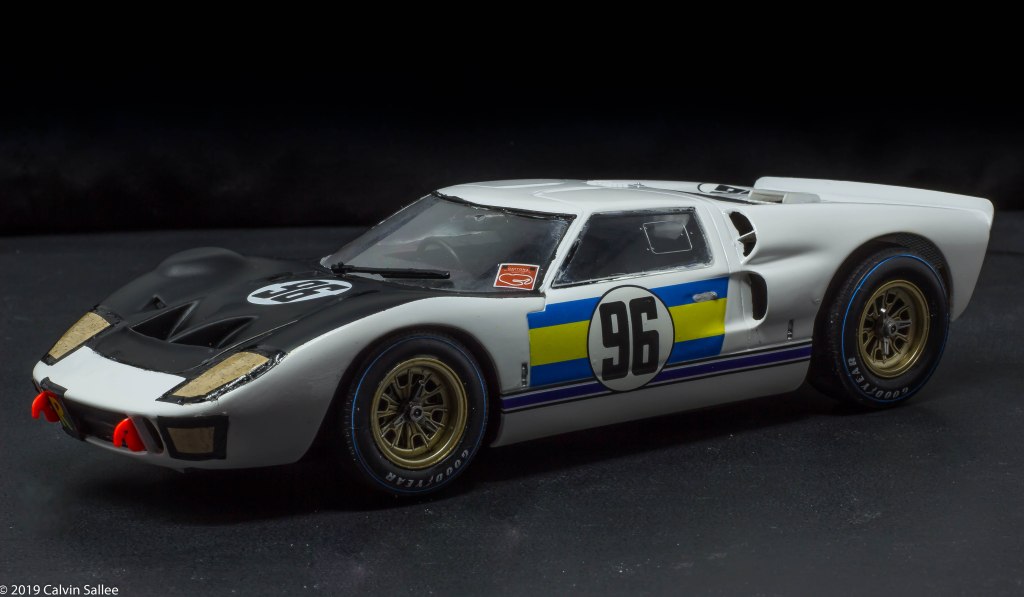
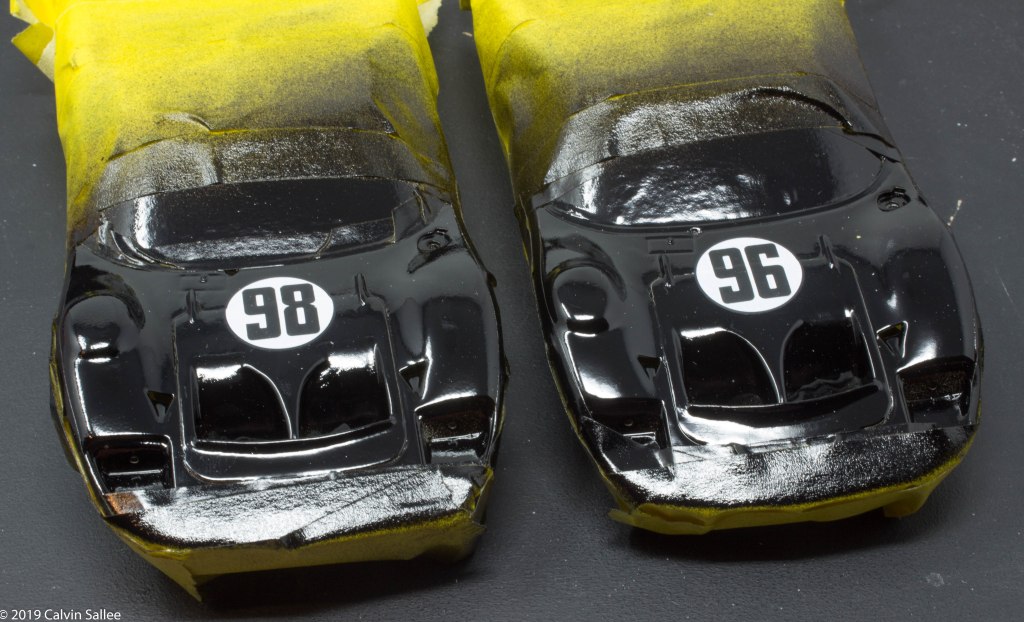
Mask off the hood area and spray with GLOSS BLACK….why gloss black? Because there is a decal on the hood and its never recommended to apply decals over a flat surface, doing so will create “Silvering” around the clear blacking of the decal, and the decal will not adhere to a flat surface very well. The decal will adhere to the nice smooth glossy black surface and the clear backing will disappear. Also take note that the #96 car had black all the way up to the windshield. The #98 and #97 cars had a white gap in between the black and windshield.
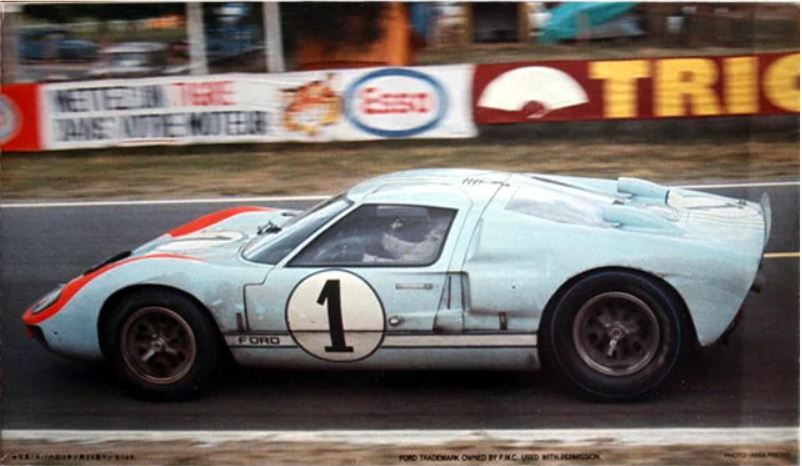
You can clearly see in this race day photo of the #96 car the black extends all the way up to the windshield. https://www.racingsportscars.com/photo/1966/Daytona-1966-02-06-096b.jpg
After the GLOSS Black is spayed on, apply the hood decal next. Wait a day or so, then Spray the black area of the hood ONLY with Tamiya Flat Clear to give the proper sheen of the black. Be sure to NOT tape over any decals, applying tape over any what slide decal, even if they have clear coat over them increases the chances of pulling the decal up off the surface.
Apply the Indycals to the gloss surface. Then let dry for a good 24hrs

Spray the gloss black down with Tamiya TS-80 Flat Clear lacquer. This will give the black the proper black sheen. It should come out Not too glossy, but not too flat.
The fine details
Im building the race start version of these cars and they had a bunch of black tape holding the headlight covers on to protect the headlights before nighttime.
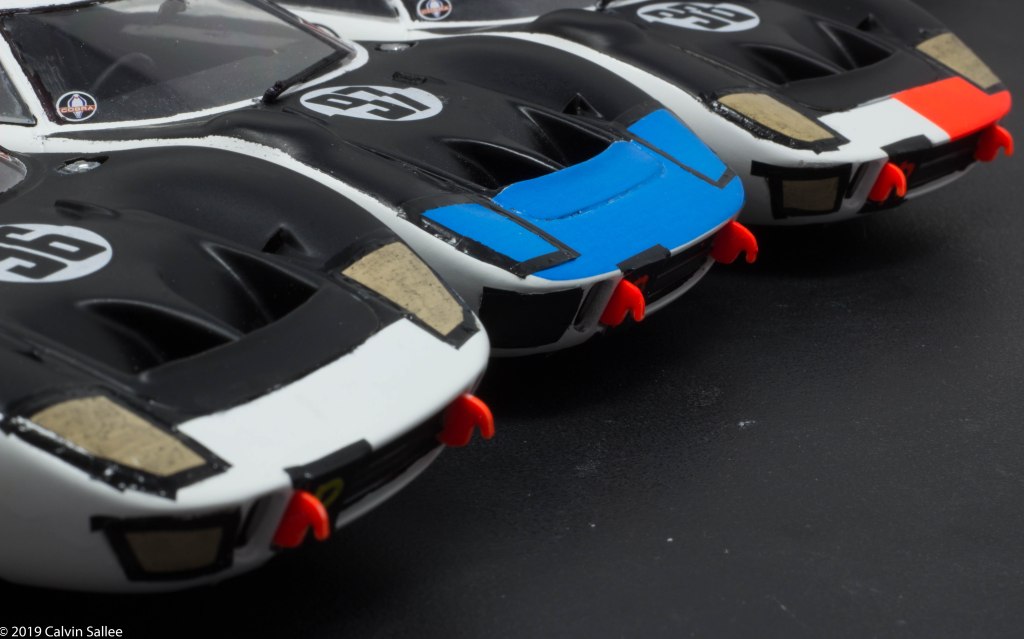
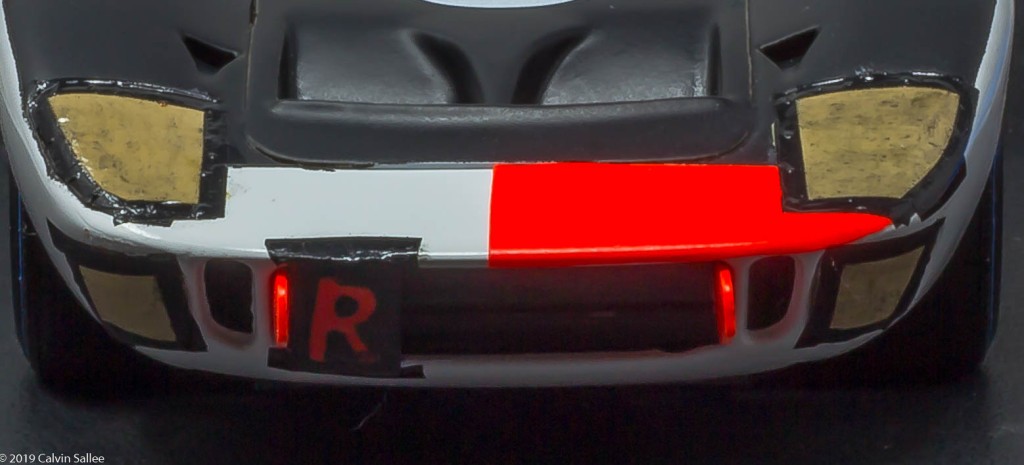
The Miles/Ruby car had dayglo markings on the door and front nose. The #98 and #97 cars had a dayglo “R” cover over the front grill.

The #98 Miles/Ruby car had a cardboard like headlight covers with black tape on the outline of the headlights. It also had the Dayglow “R” cover of the the front grill. No one seems to know what the “R” means. It was no doubt for keeping the car warm during this race as it was one the coldest in race history with ambulant temperatures at night in the mid 20’s. The dayglow “R” cover was not on the car at the end of the race.
For the radiator cover, I used very thin plastic styrene and painted them black. It just needs to be an approximate size like seen in the picture.
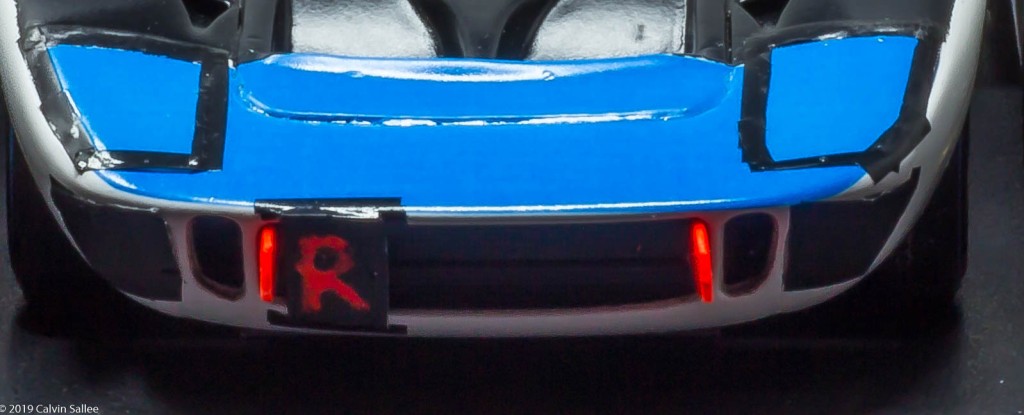
The #97 Gurney/Grant car had blue headlight covers with black tape on the outline of the headlight. It also had the Dayglow “R” cover over the front grill.

The #96 Mclaren/Amon car had cardboard headlight covers with black tape over the outline of the headlights. But, unlike the #98 and #97 cars the #96 had a Yellow “R” cover over the front grill.
When it comes to the headlight covers. I used extra decal paper and spray painted over it, like for example to replicate the cardboard look it found a can of spray paint that was close to cardboard color. Then for the black tape I spray painted decal paper and then cut out strips to replicate tape.
A reliable Dayglo paint for all the dayglo areas for these cars is Model Masters Florescent Red. Some people get confused as it does look kinda Orange, but this is totally correct. Tamiya Florescent Red is another poplar choice but it has a history of being unreliable as the paint has the tendency to go bad(?) Tamiya Florescent Red can be hit or miss as it can come out as the wrong shade of “Bright Red” This has been a big mystery in the hobby for some time. If you do plan to use a can of Tamiya Florescent Red be sure to test it out and see if it keeps it GLOW! It should glow and hurt your eye its so bright, if its not bright, then you have a bad can.
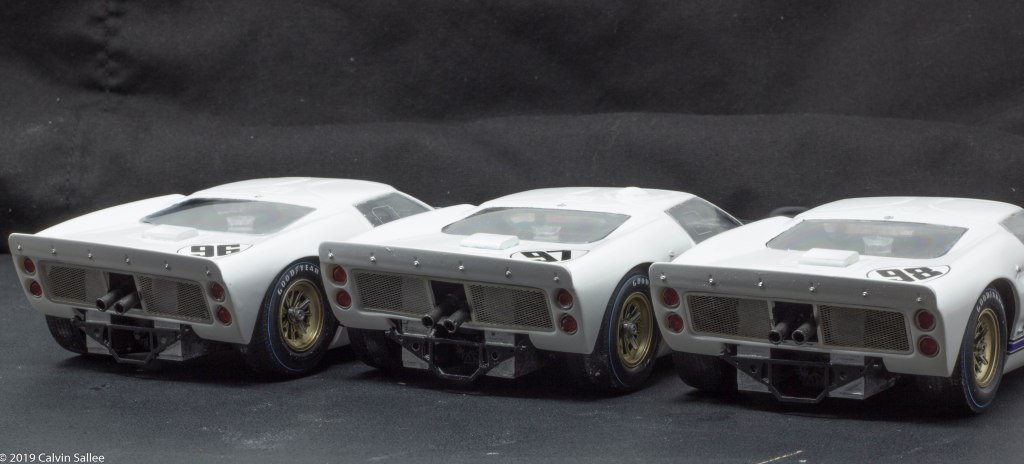
The Shelby car did run the aluminum luggage boxes at Daytona. As seen HERE
The Tires
We are using Indycals 1/24 scale high profile tires fit 1/24 Fujimi GT 40 tires with the black background it makes it way easier to handle. But the key is using Walthers Solveset decal solution. I simply cut out the tire decal and apply it to the tire and then apply the decal solution and let it sit for about 7 mins and take an old t-shirt and dab the decal down to the surface and it will start conforming to the sidewall of the tire. The decal solution softens up the decal and helps “iron out” the wrinkles.
This is why I like the Indycals tire decals. Especially on rubber kit tires, where “silvering” often happens when the clear carrier film around the graphics or letters can be seen. The black carrier film of the Indycals tire decals hides any “silvering” that may occur. I just applied the Indycals 1/24 scale high profile tires for 1/24 Fujimi GT 40 tires. I also used Walthers Solvaset Decal solution to help lay the decals snug and flat. You can buy the blue ring tire decals for the Fujimi Ford GT-40 here

The best match for the wheel color is Tamiya TS-84 Metallic Gold
This finished results!